FF7 Rebirth Walkthrough – Chapter 12 – A Golden Key


After Cid dedicates some time to repairs, the Bronco Airlines plane undergoes a transformation, its hull now serving as a watercraft. Utilize R2 to propel forward and navigate the linear path along the waterway until reaching Costa Del Sol. Dock at the harbor, and the group disembarks.

While hiking back up Mt. Corel remains an option to reach the Gold Saucer, the swiftest route involves accessing your Region Map and utilizing Fast Travel.

fast travel to golden saucer

Upon arrival, the party disperses to locate Dio. However, Cait Sith requests Cloud's attention, mentioning a legend suggesting those who enter the temple never return.

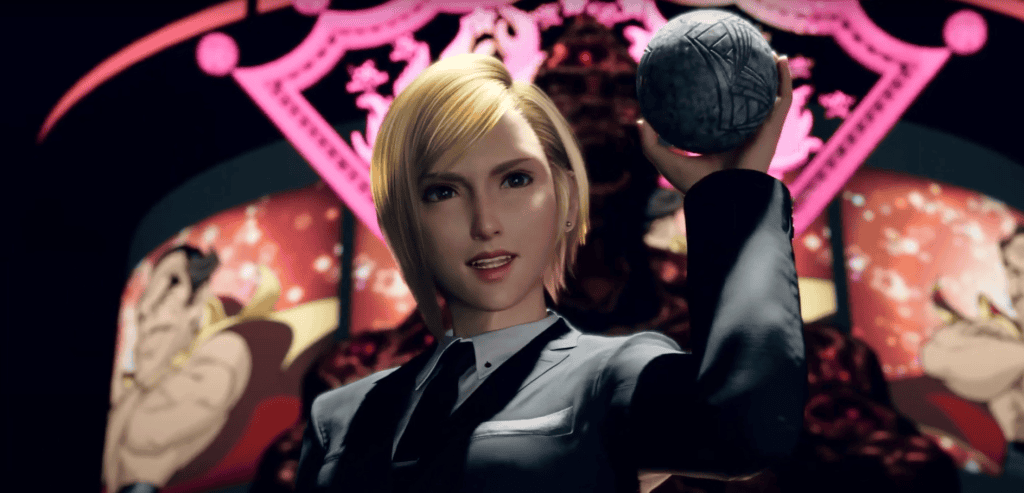
Approach the nearby guide moogle and utilize it to instantly travel to Battle Square. There, you reunite with Aerith, who points out a poster advertising an upcoming fight between Dio and Corneo. Follow Aerith into the arena, where Dio appears battered and bruised from his recent altercation with the Turks.

dio battered from fighting with the turks

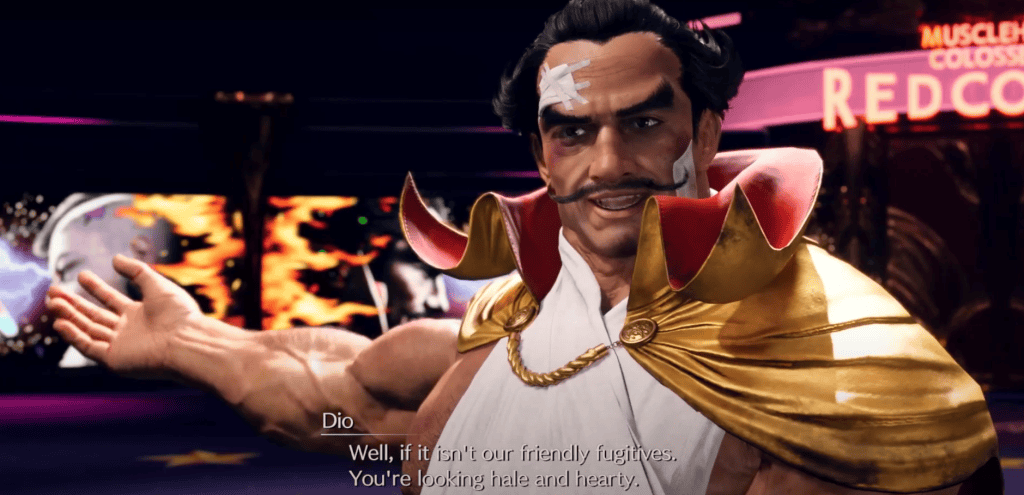
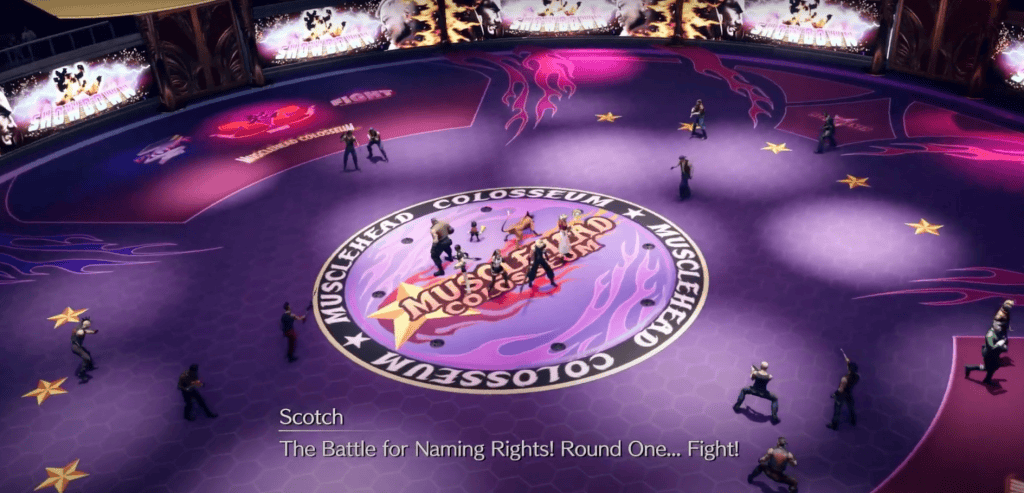
Upon requesting the keystone from Dio, he agrees but under the condition that they participate in the Fight for Naming Rights event the following day. With their consent secured, the group exits the arena and uses the guide moogle to swiftly travel to Ghost Square. Inside, they interact with the front desk and agree to rest until the appointed day.

As Cloud settles in for the night, he observes Aerith resting in her bed in Sector 5, under Marlene's watchful eye. Drifting into sleep, Elmyra summons the group to take care of Cloud in Sector 5. Climbing the stairs, they enter the room on the right, where Marlene implores Zack to ensure Cloud's well-being, stressing that Aerith's fate hinges on his presence.

marlene telling zack to make them better

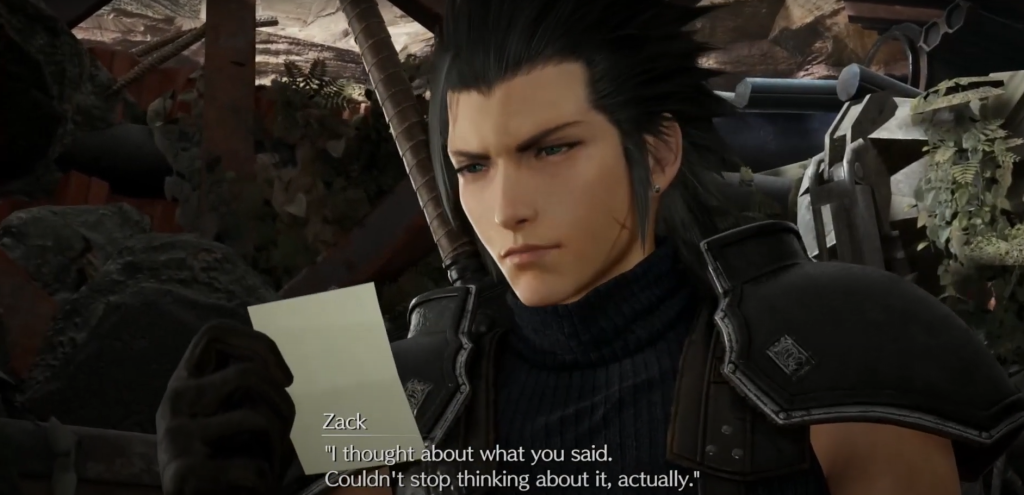
Later, in Aerith's tranquil flower garden, Zack informs Elmyra of his departure to speak with someone regarding Cloud, omitting the identity of his contact, Hojo. Before leaving, he implores Elmyra not to allow Aerith to leave if she awakens.

Heading north and ascending the steps, Zack follows the path to a waiting motorbike. As he prepares to depart, he discovers a note from Biggs attached to the handlebar detailing a plan to target Reactor 6. Filled with apprehension, Zack rushes back to inform Elmyra of the impending danger.

zack reads biggs letter

Loveless

Cloud awakens in the eerie confines of the Haunted Hotel two hours later, stirred by a persistent knock at the door. The identity of the visitor hinges on the depth of his relationships, with the most nurtured bond leading to the awaited encounter. For detailed strategies on fostering specific relationships, consult our comprehensive Romance guide. For the sake of this guide, Cait is chosen as Cloud's companion for the evening.

Embracing the invitation, Cloud joins Cait for a performance of Loveless. Navigating the corridors, they arrive at the elevator and descend to the lobby. Exiting the hotel, they utilize the guide moogle to journey to Event Square.

avalanche arrive at the theatre

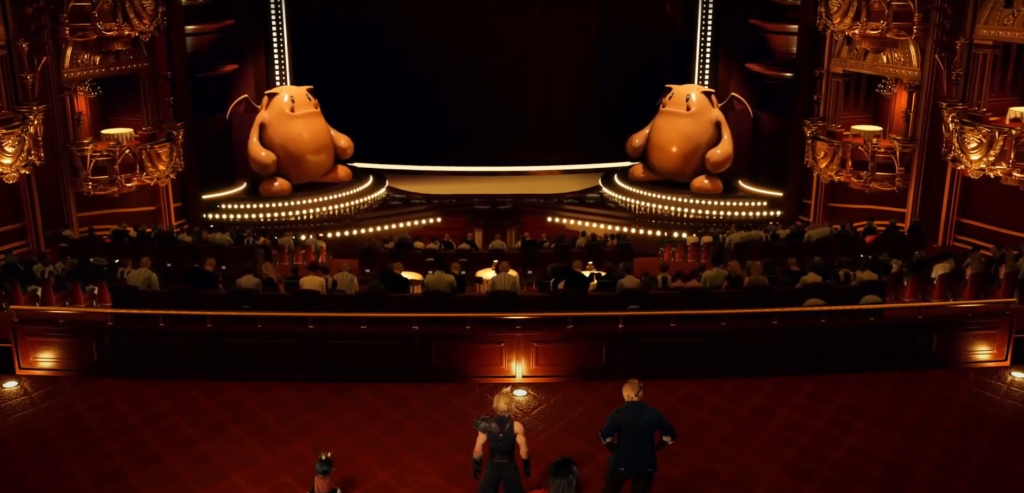
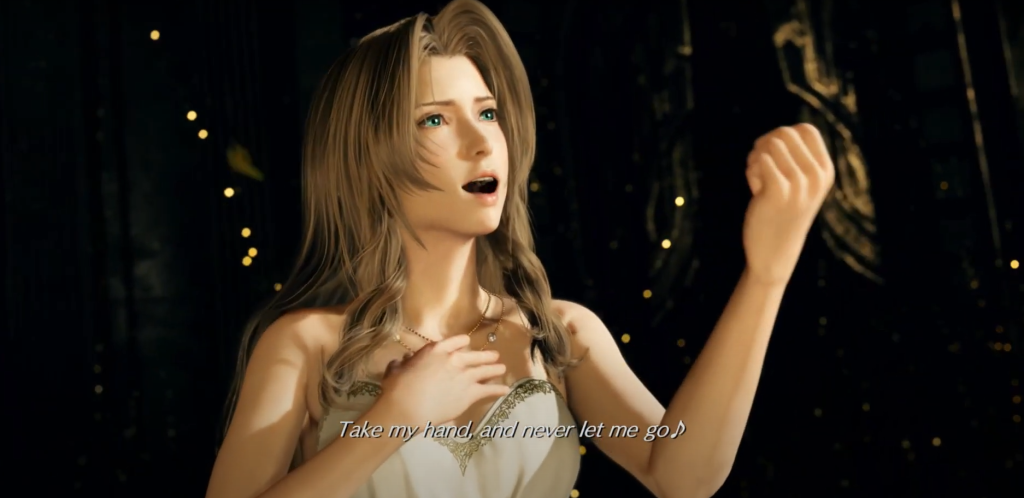
Inside the theater, they approach the usher at the end of the corridor and secure their seats. As the performance unfolds, Aerith emerges and is offered the opportunity to deliver the closing song. Enthralled by the mesmerizing ballet, Cloud and his companions are drawn into the fantastical narrative.

Awakening in a cell, Cloud surveys his surroundings, preparing for the impending performance. With a simple press of the button, the interactive sequence commences. Whether opting to practice or not, Cloud initiates the performance, unlocking the cell door with Aerith's assistance.

barret and red in costume

Teleported into a coliseum setting, Cloud finds himself confronted by familiar faces assuming theatrical roles. Barret assumes the persona of Dragon Lord Varvados, while Red XIII embodies the role of Garm, setting the stage for a dramatic encounter.

Following the first act's completion, you'll have the opportunity to select your opponent for the next segment of the performance, known as Act 2. This portion presents slightly more challenging Quick Time Event (QTE) sequences, demanding swifter reflexes and precise timing. After each act, your performance is evaluated, with grades assigned based on your execution. Achieving an overall S grade unlocks the prestigious Critically Acclaimed trophy.

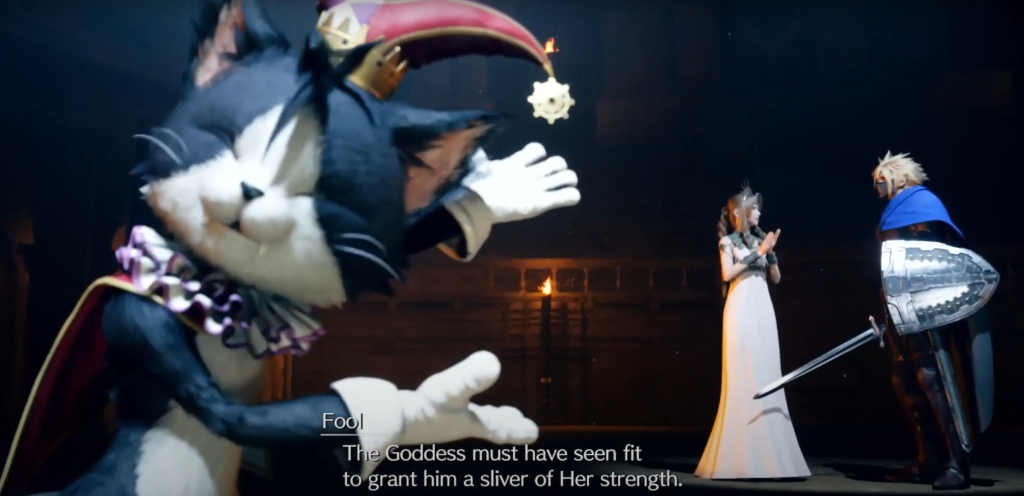
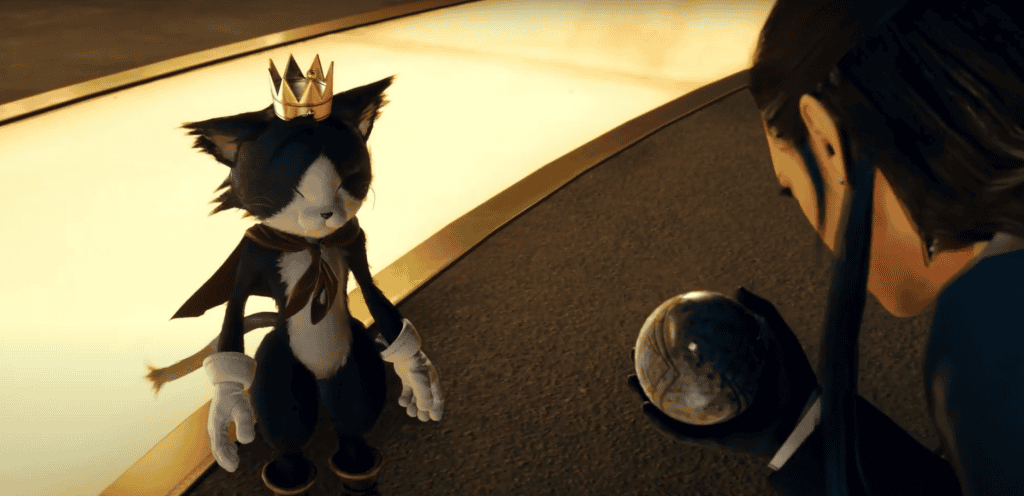
Upon finishing Act 2, you'll choose between Varvados and Rosa to receive insight into their fate from Cait, portraying the role of the Fool. Regardless of your decision in Act 1 or the subsequent divination, you'll confront the remaining foe in Act 2, navigating through QTE sequences with increased intensity.

cait the host

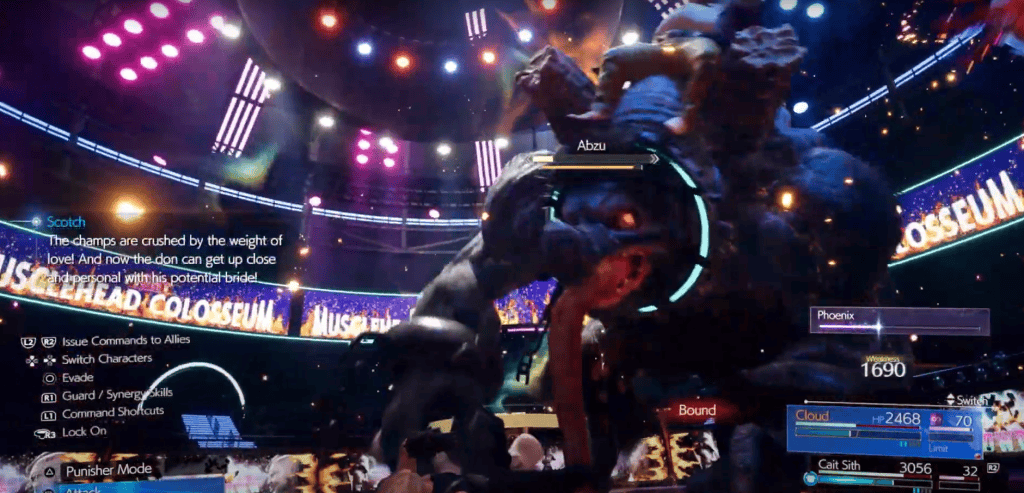
As Act 2 draws to a close, you'll have the opportunity to select your beloved companion for the final act of the performance. While the walkthrough recommends Tifa or Rosa, the decision ultimately rests with you. Regardless of your choice, Varvados initiates the concluding Act, with Rosa joining the fray to aid in the battle. A unique QTE sequence featuring all four buttons presents itself towards the end of this segment, requiring simultaneous and repeated presses to fill the bar as Rosa summons Phoenix.

With the culmination of the play, Aerith takes center stage to deliver a heartfelt rendition of "No Promises To Keep." As the song concludes, Aerith is moved to see manifestations of Jessie, Biggs, and Wedge, evoking a wave of emotion. The depth of your relationships with the entire party is further solidified based on your performance, culminating in a collective bow as they celebrate together.

aerith sings

As Cait and Cloud leave the theater, they catch wind of an announcement beckoning guests to the Skywheel. Exiting into the bustling lobby, they utilize the guide moogle to swiftly travel to Skywheel Square. Approaching the attendant stationed across the room, they confirm their reservation for a Skywheel ride.

Amidst the vibrant atmosphere filled with holograms and fireworks, Cait and Cloud engage in conversation, navigating through moments of awkwardness. Depending on the strength of their relationship, they share either a warm hug, tender kiss or nothing at all (male characters) before disembarking from the Skywheel.

The following day, high above Corel, Elena, Rude, and Tseng engage in discussion as they transport Rufus to the Gold Saucer. Delving into the topic of the temple and the promised land, they speculate on the connection between the two.

rufus

Fight For Naming Rights

Entering the "Fight for Naming Rights" event, Cloud and his party ascend the steps, preparing for the impending match. Following the receptionist's instructions, they agree to participate in the competition. However, their attention is quickly diverted as Dio's introduction is interrupted by Corneo's hypemen, Scotch and Kotch, who launch into a boastful rap about Dio's imminent defeat.

In the initial round of the event, you face off against a multitude of Corneo Jockeys. Despite their numerical advantage, these adversaries are easily managed through crowd control techniques, air juggling, and swift staggering. Their sheer numbers prove to be no match for your prowess, allowing you to swiftly dispatch them without the need for utilizing potent abilities or items.

naming rights round 1

Moving on to the second round, you encounter three special Cactuars. These agile opponents dart around the arena frantically, making it challenging to lock onto or directly damage them. Instead, you must wait for opportune moments when they momentarily pause to execute attacks such as the close-range "Spine Spew" or the ranged "1,000 Needles". Seizing these moments, you capitalize on their vulnerabilities, quickly building up their stagger gauge for effective takedowns.

round 2 cactua

As the competition progresses to Round 3, you face a formidable challenge in the form of two Tonberries accompanied by a larger Donberry. Prioritizing the smaller Tonberries, you engage them cautiously, mindful of their devastating "Chef's Knife" attack capable of incapacitating you with a single blow. With strategic maneuvering and calculated strikes, you navigate through this intense round, inching closer to victory with each decisive move.

round 3 tonberry

Upon vanquishing the previous adversaries, Corneo emerges from the center of the arena atop a massive creature known as Abzu, signaling the commencement of a formidable boss battle.

Abzu Boss Fight

Weaknesses: Fire Lesser/Greater

Resistances: Ice (L), Stop (L)

Immunities: Proportional Damage, Slow, Poison, Silence, Petrify, Stone, Morphable Items

Enemy Intel: Inflicting sufficient fire damage will ignite Abzu, applying pressure. When its HP drops below half, Abzu will begin evading fire spells, and Corneo will attempt to extinguish any flames. If Abzu misses its Ferocious Charge and crashes into the wall, it will be pressured, causing Corneo to faint.

corneo riding abzu

Abzu presents as a large, bipedal bull-like creature primarily employing charging attacks and melee strikes. One of its basic melee maneuvers is the "Flail," wherein Abzu swings its arm around to deliver a powerful backhand strike.

Another notable attack is the "Ground Pound," where Abzu raises both hands, then slams them into the ground, unleashing a shockwave in front of itself.

True to its name, "Charge" sees Abzu darting towards a specific area of the arena, then lining up to charge directly at you. As it approaches, it swings its head upward, attempting to flip you into the air upon impact.

abzu charges

Dodging during Abzu's charge is crucial to avoid being caught mid-attack. "Ready to Rampage" indicates an enraged state, amplifying the charge's intensity and potentially disrupting your dodge timing.

Similar to the Galian Beast, Abzu retaliates with an automatic counterattack, known as "Counterpose," should you attempt to launch an offensive during its maneuvers.

Initiating any close-range attack during this state triggers "Reversal," wherein Abzu forcefully slams you to the ground. "Bash" mirrors this move, delivering a powerful fist slam as an individual attack.

abzu gets enraged

"Enrage" marks Corneo pouring a fluid into Abzu's mouth, boosting its Bravery but also inflicting Deprotect. In this heightened state, Abzu executes "Bash and Smash," unleashing three consecutive ground-pounding punches while pursuing you, with a slight delay on the third punch.

Beware of "Pounce," where Abzu crouches on all fours, mimicking a charging stance, before springing through the air toward you in an attempt to grab you. Dodge immediately after Abzu leaps to evade its grasp, causing it to roll onto the floor and become Pressured.

abzu get frenzied

Around the 50% health mark, Abzu enters a frenzied state independently, enhancing its attacks. "Ferocious Charge" involves three consecutive charges, executed much faster than earlier in the fight, with reduced recovery time between each. Dodging repeatedly is essential until Abzu regains its footing. There's also a chance that the third charge will result in Abzu colliding with the arena wall, causing it to become Pressured, allowing you to capitalize on the opportunity.

The once simple "Flail" evolves into a frenzied spinning attack, where Abzu extends its arms and whirls across the arena towards you. This maneuver not only necessitates maintaining distance but also demands constant movement, as Abzu's motion gradually draws you in.

abzu pounces

"Upheaval" sees Abzu radiating red energy as it raises its fists into the air. After a brief pause, Abzu slams down, unleashing a shockwave of crimson energy that blankets the entire arena, inflicting damage upon contact. The optimal strategy to evade this onslaught is to take to the air and remain airborne, executing attacks until the wave dissipates.

As Abzu nears defeat, it triggers "Frenzy," heightening its aggression, accelerating its attacks, and granting it new abilities such as "Belly Flop," a straightforward yet devastating attack.

In the throes of "Frenzy," combos like "Bash and Smash" extend, requiring heightened readiness to dodge or block incoming assaults.

corneo defeated

Defeating Abzu yields 4,680 EXP, 10 AP, 975 Gil, 50 Party EXP, and a Phoenix Down.

Following the defeat of Abzu, Corneo retreats, overwhelmed by humiliation and intimidation from the party. Dio expresses his gratitude and prepares to present the keystone when suddenly, the lights dim, and Elena rushes in, snatching it away.

elena steals the keystone

Engaging in a frantic game of toss with Rude, Elena and Rude skillfully keep possession of the keystone, passing it to Cait Sith, who unexpectedly assists them before fleeing the arena. Meanwhile, Cloud, Tifa, and Aerith square off against Elena and Rude once more, while their comrades give chase to Cait.

Dio provides a Rest Bench and vending/Folio machines for your use before you approach him again to initiate the final showdown.

Elena and Rude (Gold Saucer) Boss Fight

Weaknesses: Rude - Wind, Elena - Lightning Lesser/Greater

Resistances: Petrify (L - Rude only), Stop (G), Sleep (G)

Immunities: Proportional Damage, Slow, Silence, Stone, Morphable Items

Enemy Intel: Striking Rude with powerful offensive abilities while his guard is up will pressure him. Interrupting his synergy strikes will also pressure him.

Similarly, hitting Elena with potent offensive abilities will apply pressure. Disrupting her synergy strikes will also have the same effect.

The combat tactics employed by Elena and Rude in this encounter closely mirror those encountered in the Mythril Mines, minimizing the need for detailed explanations.

elenas with grenades

Elena frequently deploys "Stun Grenades" to shock and momentarily incapacitate you, alongside "Grenade Kicks" that serve a similar purpose. Given her penchant for ranged attacks with grenades and pistols, she is often the optimal target for prioritization. Notably, Elena is more susceptible to Pressure and subsequent staggering.

Both Turks execute minor combos with their agile combat style, integrating basic strikes seamlessly. However, they pose minimal threat individually.

Rude relies heavily on "Shockwave" attacks, projecting energy beams towards you, either singularly or in a triple shockwave pattern. These attacks are easily evaded with simple adjustments to your positioning. Additionally, he employs "Spirit Geyser" to summon spouts erupting from the floor beneath you.

cloud attacks rude

Midway through the battle, Elena and Rude converge in the arena's center, reminiscent of their maneuver in the Mythril Mines. Elena unleashes "Nadefield," bombarding the area with grenades in all directions, while Rude intensifies his "Shockwave," emitting multiple beams simultaneously in various directions.

Both Elena and Rude initiate charge-up attacks following their standard combat maneuvers: "Turk's Vengeance" for Elena and "Turks' Two-Step" for Rude. If executed successfully, Rude slams the ground, launching everyone airborne, while Elena delivers a powerful kick mid-air.

With Elena often being the primary target, Rude showcases formidable attacks of his own, such as "Whirlwind," summoning a miniature tornado capable of launching you skyward, and "Spinning Axe Kick," a forceful vertical slam with his leg.

turks are defeated

Upon their defeat, you earn 7,020 EXP, 20 AP, 5,850 Gil, and 50 Party EXP, along with a Mega-Potion.

Following the confrontation with Elena and Rude, they brace themselves for another round before Rufus Shinra makes a grand entrance into the arena. Dismissing Elena and Rude, Rufus singles out Cloud, prompting him to usher Tifa and Aerith away for a one-on-one showdown.

rufus fights at thye gold saucer

Rufus Boss Fight

Weaknesses N/A 

Resistances Poison (G), Sleep (G)

Immunities Proportional Damage, Berserk, Slow, Stop, Poison, Silence, Sleep, Petrify, Stone, Morphable Items

Enemy Intel: Striking him while he is reloading or landing an ATB command after he attacks will pressure him. ATB commands will leave him open longer than basic attacks. Hitting him with certain attacks while he is reloading or after he attacks will stagger him instantly. Inflicting enough damage or severing its link with Rufus will pressure Darkstar

Rufus proves to be a challenging opponent in this encounter, boasting immunity to elemental damage and the ability to counter nearly every attack. This battle demands precision timing and strategy, as Rufus will retaliate swiftly to any assault.

cloud and rufus fight

One effective tactic is to strike Rufus during his reloading phase or after he launches an attack, leaving him momentarily vulnerable. Utilizing ATB commands rather than basic attacks can extend this window of opportunity. Fans of FF7 Remake will find this battle reminiscent of similar encounters.

Rufus employs unique maneuvers, such as "Bad Luck," where he releases a tracking purple orb. Timely execution of ATB attacks like "Braver" can effectively engage Rufus without undue difficulty.

rufus and his pet

Midway through the battle, Rufus summons his hound, Darkstar, which is directly linked to him. Breaking this link renders Darkstar vulnerable, allowing for focused damage. Prioritize eliminating Darkstar to gain 3,900 EXP, 10 AP, and 1,950 Gil.

After dealing with Darkstar, the fight against Rufus continues. He employs techniques like "Divebomb," launching into the air before crashing down, and "Up in Smoke," deploying a temporary stun with a smokebomb.

rufus leaves the arena

In total, defeating Rufus earns you 3,900 EXP, 10 AP, 1,950 Gil, and 50 Party EXP.

Finding Cait Sith

After the intense battle with Rufus, he disappears in a haze of smoke, leaving Tifa and Aerith to reunite with you as you refocus on locating Cait Sith. Venturing into the shop to your right, Cait Sith is spotted atop the circular toy display.

finding cait

Swiftly giving chase, you pursue Cait as he dashes out of the area, using the tunnel tracks to emerge back into the main hub of the Gold Saucer. Making your way southeast on the ground level, you encounter two Moogles on a bench. Engaging with the one on the right reveals Cait hiding once again.

finding cait part 2

With Cait bounding off down a nearby side path, you continue your pursuit through the corridors, ensuring to seize the opportunity to loot a conspicuous chest along the way, obtaining a Crystalline Cross for Yuffie.

Pressing on, you navigate through the passages and eventually emerge outside onto the helipad. Here, Cait surrenders the keystone to Tseng before departing via a chopper. Disappointed and frustrated, the group chastises Cait Sith, who apologizes but admits it was inevitable, bidding farewell to the party for good.

caIT AND TSENG

Amidst the group's heated debate about their next move, Vincent reveals his ability to track the Turks' helicopter, while Cid offers the radio on his plane/boat to tap into their frequency. When prepared to depart from the Gold Saucer, you consult the Region Map and Fast Travel back to Costa Del Sol. Making your way forward and down to the dock, you engage with Cid to commence testing the radio.

Posted in
Article Contents
    Add a header to begin generating the table of contents