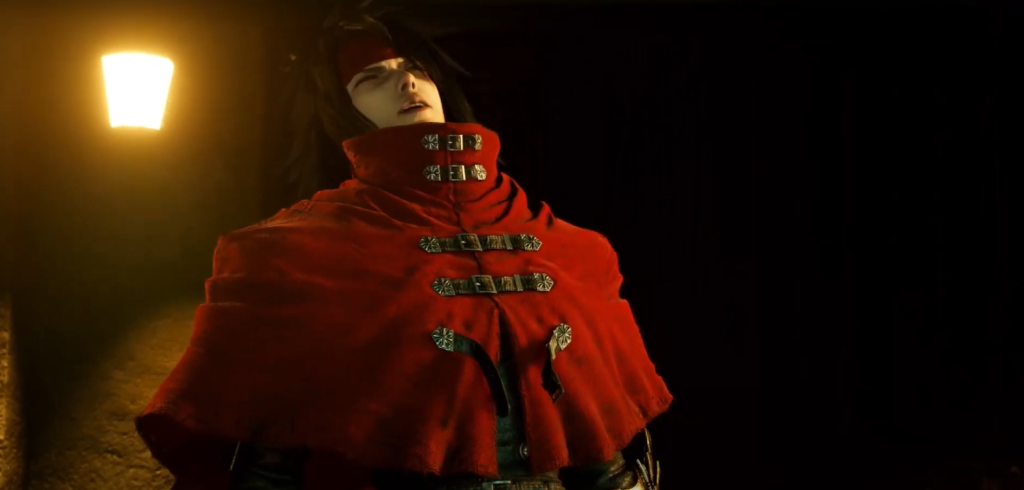
FF7 Rebirth Walkthrough – The Long Shadow Of Shinra

Starting from the airstrip, begin your journey by heading southeast and follow the road as it curves and meanders its way down until you reach Gjallar Bridge. Keeping to the right path will be made evident by the presence of several hooded figures scattered along the road, all moving in the same direction you should follow.
Back In Nibelheim
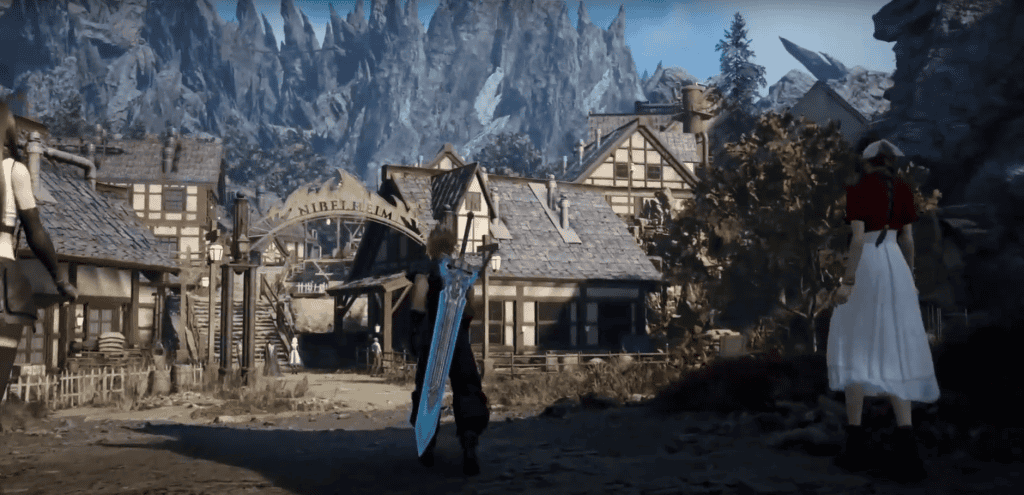
Continuing on, you'll eventually find yourself back in Nibelheim village, where Tifa and Cloud will observe that everything has been reconstructed to its former state. Ascend the steps leading up to the town square, dominated by the towering water tower, and you'll notice numerous hooded figures dispersed throughout the area.
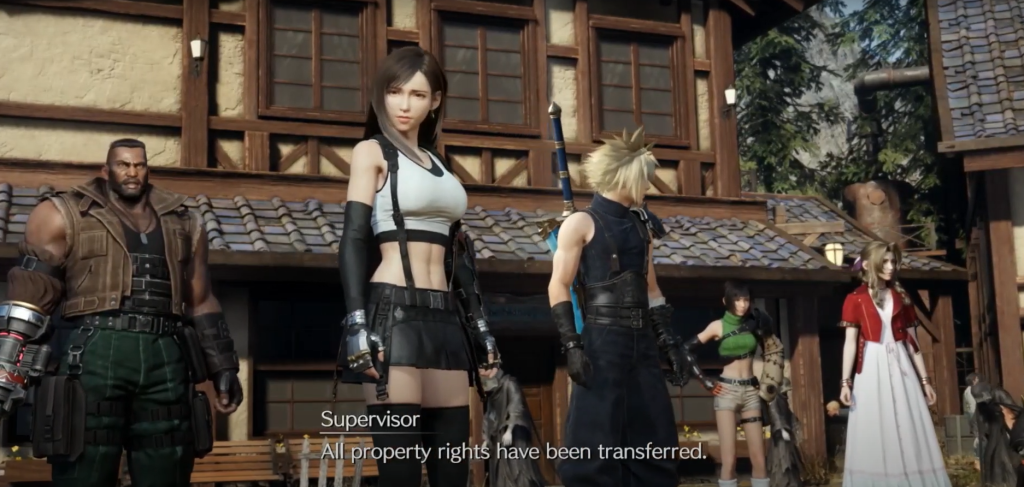
Approaching you is a supervisor who discloses that Shinra has taken direct control of Nibelheim five years ago, transforming it into a facility dedicated to treating mako poisoning. As Cait Sith hurriedly makes his way into the nearby town hall to utilize the Shinra Terminal for gathering information, you're left with the freedom to explore the town at your leisure.
While Cait Sith busies himself with his terminal search, take the opportunity to wander around the town and engage in conversations with each of your party members, aiming to strengthen your relationships. You can also participate in the nearby QB match, pay a visit to the store, and explore Cloud and Tifa's childhood homes.
Venture inside the hotel, where a fleeting yet poignant vision of Zack ascending the stairs may catch your eye. Pursue this apparition and enter the bedroom, where Cloud will experience a flashback of his past conversation with Zack during the Nibelheim mission.
Upon exiting the hotel, follow the prompt to enter the town hall, turning right to locate Cait Sith at the terminal. The Supervisor, with restricted access, explains that gaining entry to Shinra Manor requires consulting Commissioner Murasaki at the reactor.
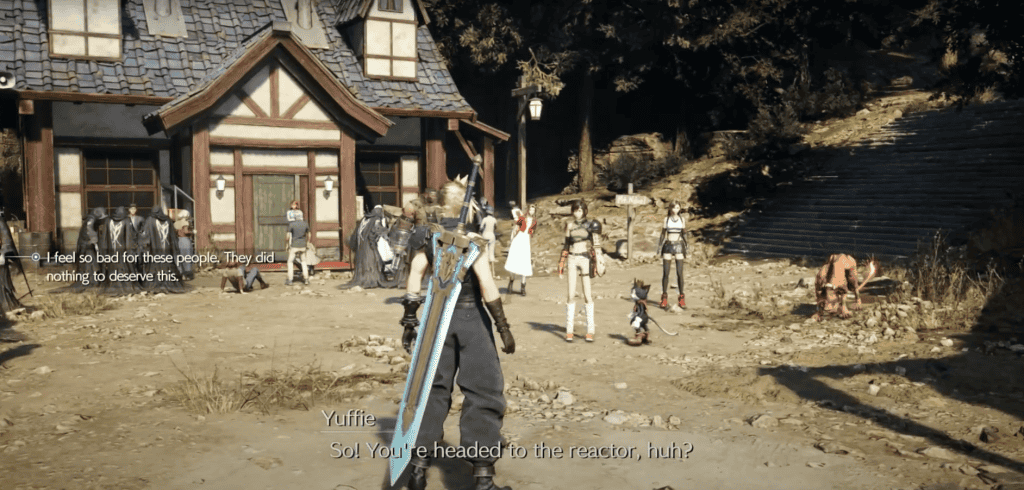
Leave the town hall and turn right to regroup with your party, where Tifa and Yuffie express their willingness to accompany you to the reactor. Opt to proceed, and the trio will set out. Meanwhile, in Rufus's office at the Shinra Building, Heidegger informs Rufus of the Nibelheim survey team's ambush by Wutai, signaling the initiation of their plan.
Returning to Cloud's perspective, your instinct may lead you to veer left towards the manor. However, a more fruitful path awaits to the north, leading you through the grass until you reach a newly constructed bridge.
Cross over and proceed westward, pausing to loot a chest containing a pair of Crystal Gloves along the way. Midway across the twin wooden drawbridges, Cloud's gaze downward triggers a flashback to the mission years prior, revealing that the Shinra trooper swept away by the tide was none other than Zack.
Cloud grapples with the weight of forgotten memories concerning his friend, but Tifa's comforting words reassure him. She confesses to withholding this truth from him to shield him from pain and pledges to reveal it to Aerith upon their reunion. Complete the crossing, confronting two Insectoid Chimeras and a Velociwing along the way. Post-battle, ascend to the left to utilize a Rest Bench and vending/Folio machines as needed.
To advance, venture into the cave to the northwest, engaging in a skirmish with two Twin Brains. With them vanquished, descend from the ledges to the west, arriving once more at the materia structure reminiscent of the Nibelheim mission. Cloud's mind is plagued by visions, but Tifa's subtle encouragement spurs the trio onward.

Before ascending the slope to the north, pivot and seize the HP<>MP materia lying on the ground behind you. As you ascend, brace yourself for a skirmish with two Velociwings, followed by a clash with 4 Kyuvildun after scaling several ledges. Proceed westward, utilizing the handholds to facilitate your ascent.
To the right, utilize the next set of handholds for further elevation, only to discover the wooden planks previously used for traversing now lie in disrepair. Yuffie comes to the rescue, tossing out a grapple for you to ascend and continue along the path. Remember to employ your Terrain Action (O) to ascend higher ledges!
Swiftly, a Zu bird appears, followed by two Kyuvildun and a Velociwing. Press on, navigating up the ledges until you encounter two Screamers in a spacious area.
With victory secured, you'll spot two extensive sets of handholds. Opt for either path, each offering opportunities to scavenge resources and chests along the way.
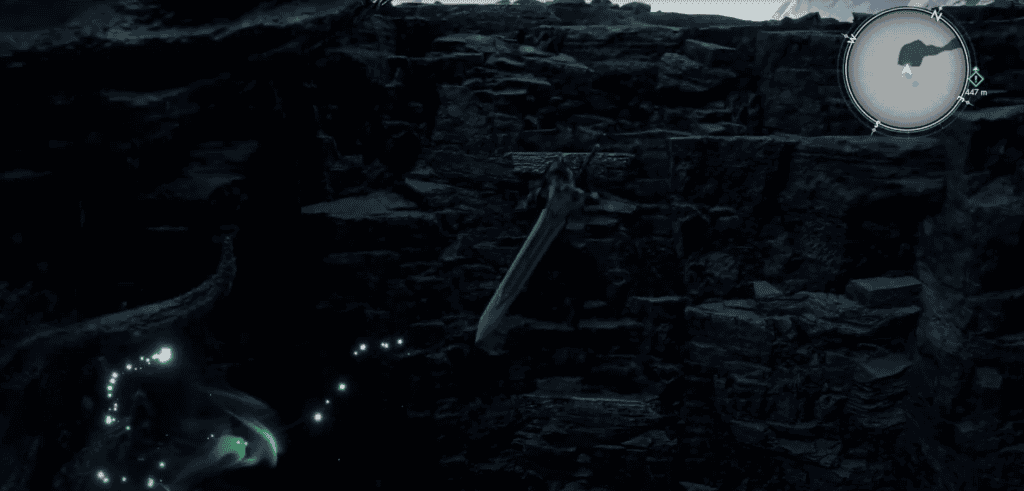
Upon finally cresting the summit of the cliff face, you'll encounter a fork. Hasten up the slope to the right to swiftly secure a warding materia, then backtrack and pursue the alternative path. At its terminus, you'll descend into an arena where a formidable Dragon awaits.
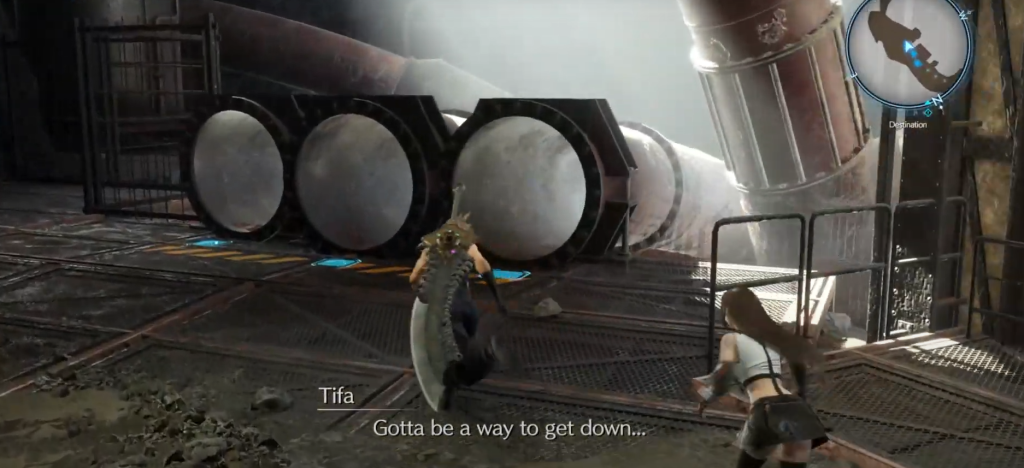
Once the dragon lies defeated, duck beneath the crevice in the rock to the east and descend the slope, leading you to three distinct pipes for entry and descent.
There's no "incorrect" choice of passage, but your selection of pipes will dictate the loot you gather. Refer to the schematic below, delineating the pathways of the pipes. Progression occurs from right to left, commencing at Level 5. For instance, A1 denotes the leftmost pipe among the initial three.
For those seeking an optimal route to amass the most resources, consider navigating through the following pipes:
Opting for the left-most pipe, any of the three pipes on the second level, and the right-most pipe among both pairs on the third level, you'll find yourself with just one pipe left to descend to reach Level 1. Upon arriving at the bottom, manipulate the corded generator to align it with the gap in the top section of the barbed wire fence. Climb over and proceed along the path, where you'll be ambushed by two Twin Brains.
After vanquishing them, open the door on the northern wall and venture into the cave to the right. At the tunnel's end, ascend the elevator. Upon reaching the top, ascend the sloping steps and encounter the corpses of Wutai ninjas, prompting the trio to speculate about the outbreak of war between Shinra and Wutai.
Nibelheim Reactor
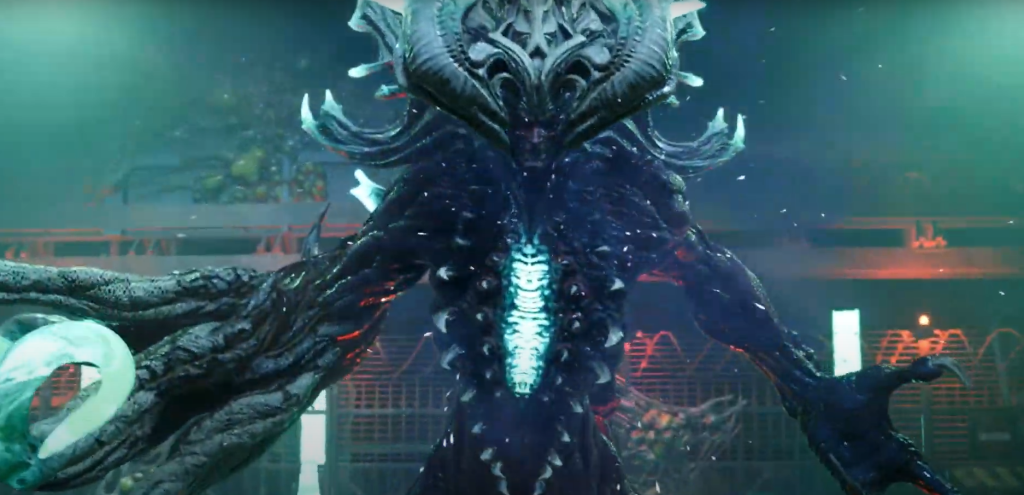
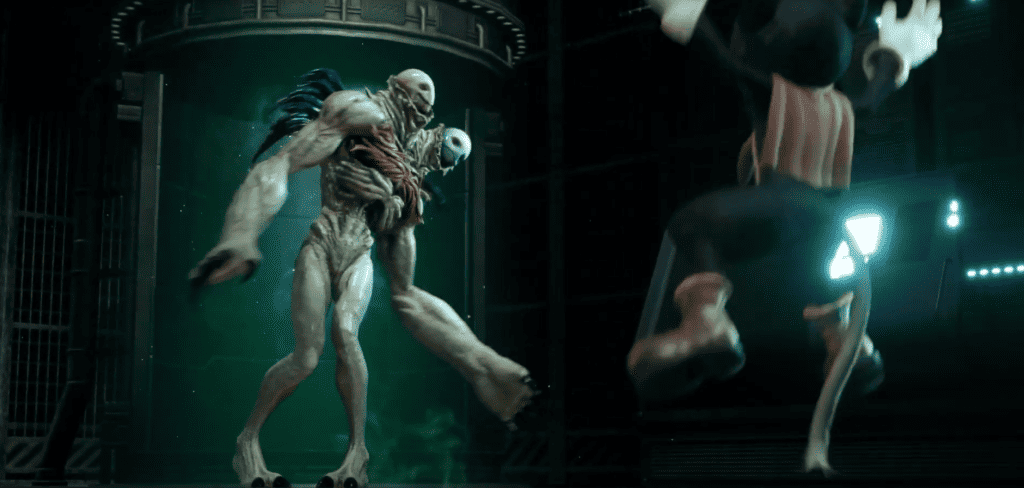
Proceed up the steps toward the reactor, utilizing the Rest Bench and vending/Folio machines as necessary. When prepared, enter the reactor and proceed right into the elevator. Descending, you'll emerge into a chamber adorned with peculiar materials coating the floor and walls, just as a grotesque mutant creature, dubbed the Diabolic Variant, materializes before you.

Boss Fight: Diabolic Variant
Diabolic Variant
- Weaknesses: Ice
- Lesser/Greater Resistances: N/A
- Immunities: Proportional Damage, Slow, Poison, Silence, Sleep, Petrify, Stone, Morphable Items
- Enemy Intel: Destroying the tentacles on its right arm will pressure it. It will summon a clone once it has taken enough damage.
The Diabolic Variant emerges as a formidable adversary, wielding an array of bizarre and ferocious attacks. One such maneuver, the "Tentacle Slam," involves the creature raising its right arm, comprised entirely of writhing tentacles, and forcefully slamming it down onto your position.
This assault tracks your movements until the moment of impact, necessitating a well-timed block or dodge to evade it successfully.
Among its repertoire of basic strikes, the Diabolic Variant employs a forward jab with its tentacle arm, extending outward as it strikes, as well as a standard horizontal or diagonal swipe. Additionally, it can unleash an area-of-effect attack, releasing a burst of purple gas that not only knocks you back but also inflicts poison. This particular move is frequently utilized if engaged in close-quarters combat for an extended period.
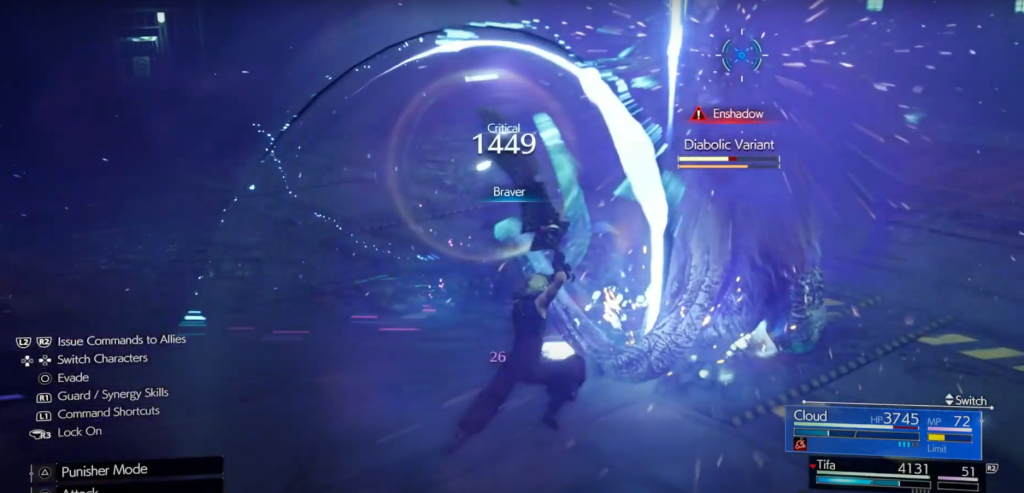
"Ensnare" mirrors the aforementioned forward jab but aims to ensnare and immobilize the targeted party member, subjecting them to ongoing damage over time through poison. If ensnared, swiftly switch focus to another party member and concentrate attacks on the right arm to free the trapped individual expeditiously. Indeed, prioritizing the destruction of the Right Arm is crucial, as it temporarily restricts the Diabolic Variant's offensive capabilities.
Special Attacks of the Diabolic Variant
- Enshadow: This relentless assault involves the creature holding its position while dispersing a poisonous gas cloud that blankets the entire arena. It's imperative not to relent and to focus on staggering the DV as swiftly as possible to halt this attack.
- Firaga: A familiar yet intensified version of this attack, the Diabolic Variant launches a flaming projectile that aggressively and accurately homes in on its target. It demonstrates a higher level of precision compared to previous iterations encountered in the game.
- Illusory Dive: Engaging in a deceptive maneuver, the DV vanishes into a cloud and reemerges from above, crashing down with a small shockwave area-of-effect. Maintaining mobility throughout the attack duration ensures safety from both the initial impact and the subsequent blast.
- Toxic Mire: This area-of-effect ability involves the DV outstretching its hand to summon a poisonous gas cloud in front of it. However, it typically poses a minimal threat, as it only affects those directly in front of the Diabolic Variant who fail to maneuver— a tactic not advisable in any combat engagement, particularly this one.
- Tentacle Drill: In this maneuver, the DV drives its arm into the ground, causing tentacles to shoot vertically upwards beneath your position. To counter this assault, maintain constant movement and, if feasible, initiate airborne attacks in close proximity to the DV before the tentacles emerge.
- Duplication: The Diabolical Variant possesses the ability to replicate itself, generating multiple threats within the arena simultaneously. Each duplicate can independently target and attack you. It's advisable, whenever possible, to concentrate your offensive efforts on one Variant at a time to diminish their collective impact.
Identification Tip: The true Diabolic Variant can be discerned by the color of its tentacles. If they exhibit glowing blue tips, prioritize targeting that Variant. Conversely, if the tentacles lack this distinctive hue, it's advisable to conserve your abilities and refrain from engaging them.
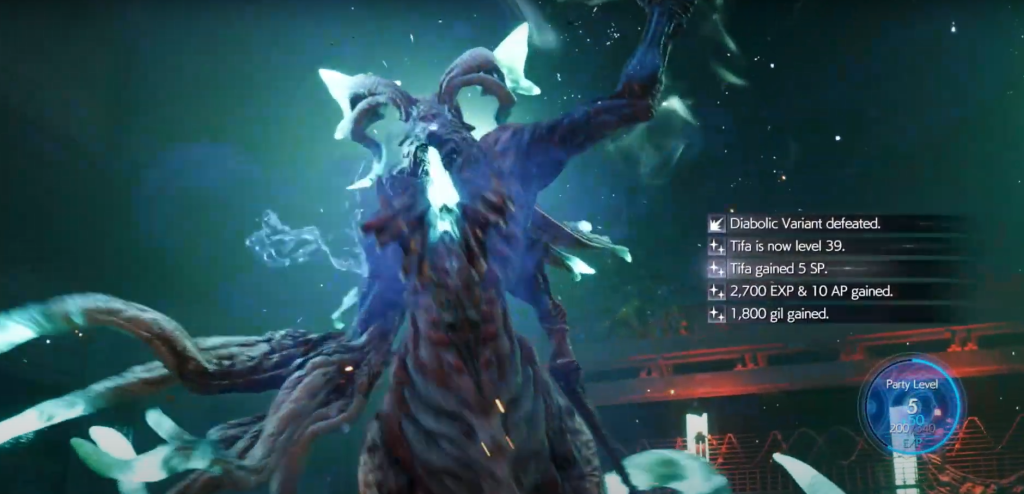
Rewards: 1,800 Gil, 50 Party EXP
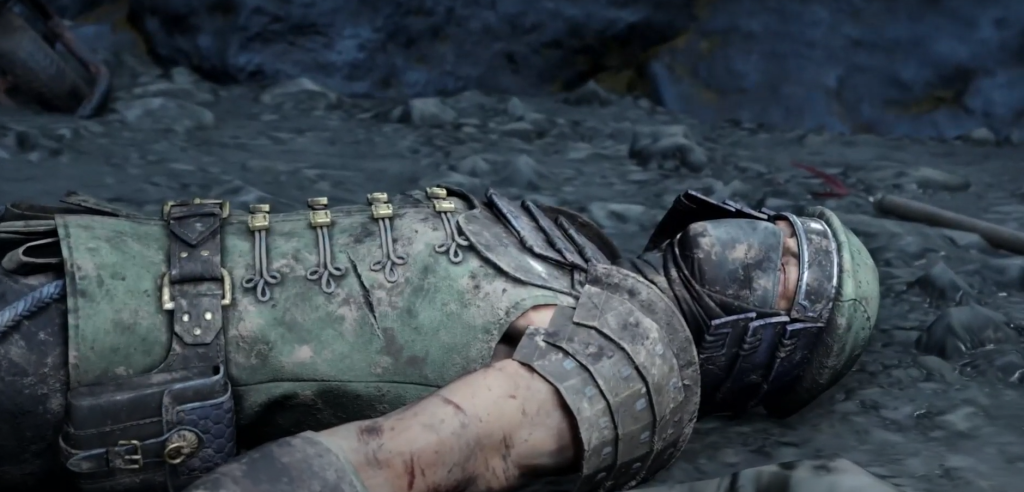
Upon vanquishing the Diabolic Variant, proceed through the automatic doors located on the southern wall. Descend the ladder and traverse the walkway until you come across the lifeless body of Murasaki. This sight triggers poignant flashbacks for Tifa, reminding her of her father's tragic demise. Yuffie, seizing the opportunity, retrieves the ID Card from Murasaki's body as the group resolves to embark on a search for any remaining survivors. Despite their efforts, they find no one alive.

With determination, Yuffie initiates the activation of a terminal, while Cloud experiences unsettling flashes of Sephiroth's ominous taunts. Through the terminal, Yuffie establishes communication with Cait Sith, who guides them to insert the ID Card, granting remote access. They agree to rendezvous at Shinra Manor, a crucial destination in their quest for answers.
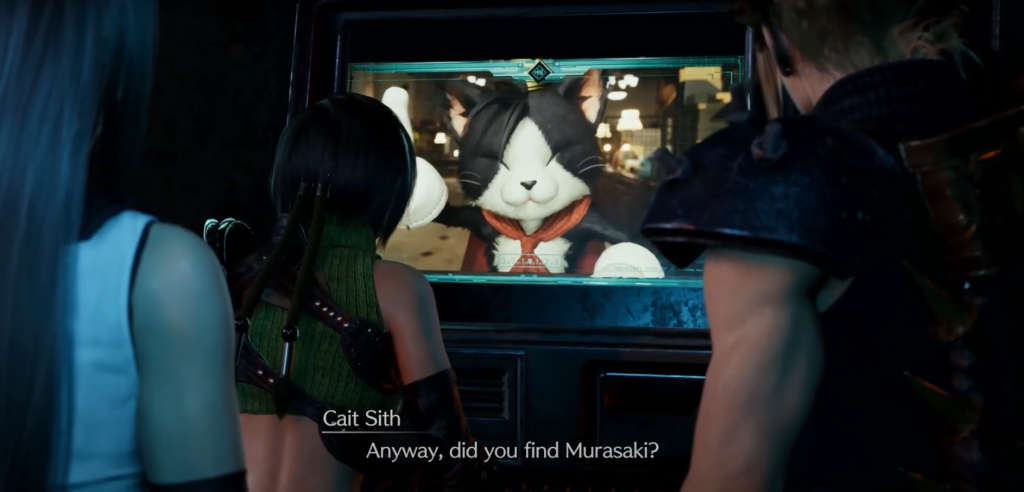
Meanwhile, at the Town Hall, Cait Sith sets out on his mission, accompanied by Barret and Aerith.
As Cait Sith:
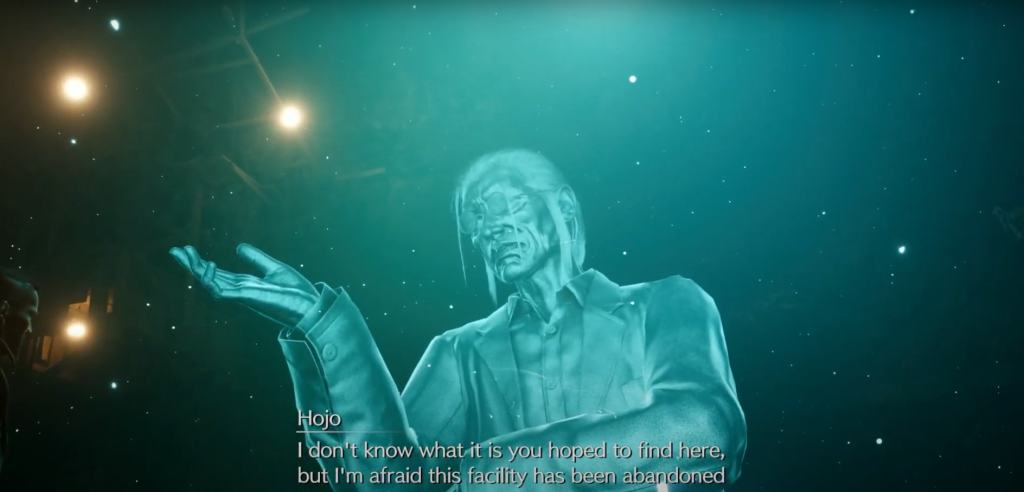
Exit the town hall and head toward the right, venturing out of the village. Follow the path leading toward Shinra Manor, turning left upon arrival. Enter the manor and proceed left to locate the elevator. Upon reaching the lower level, entering the next room unveils a startling revelation: Hojo, the nefarious scientist, is monitoring their movements through the security systems. Suddenly, a trap door opens beneath them, plunging them into an unforeseen predicament.
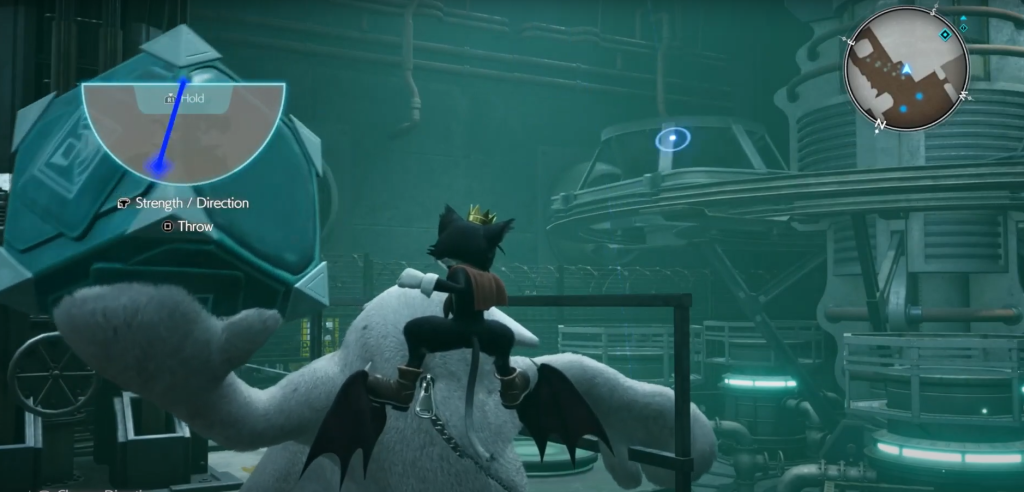
Upon reaching the bottom, assume control of Cait Sith and navigate through the air vent ahead by rolling with the R2 button. Upon emerging in the next room, confront and defeat a Bahba Velamyu. Following this, summon your Moogle companion by pressing Up on the D-Pad and position yourself on the blinking switch. This action triggers a wooden box to descend to the left. Utilize the Moogle's abilities by pressing L2 to pick up the box.
With the box in hand, prepare to throw it by pressing R1, adjusting the aim with the left analog stick. Target the button positioned up and to the right of the gate where Barret and Aerith are confined. Upon successfully hitting the button and freeing them, proceed northward and engage in battle with two Black Bats.

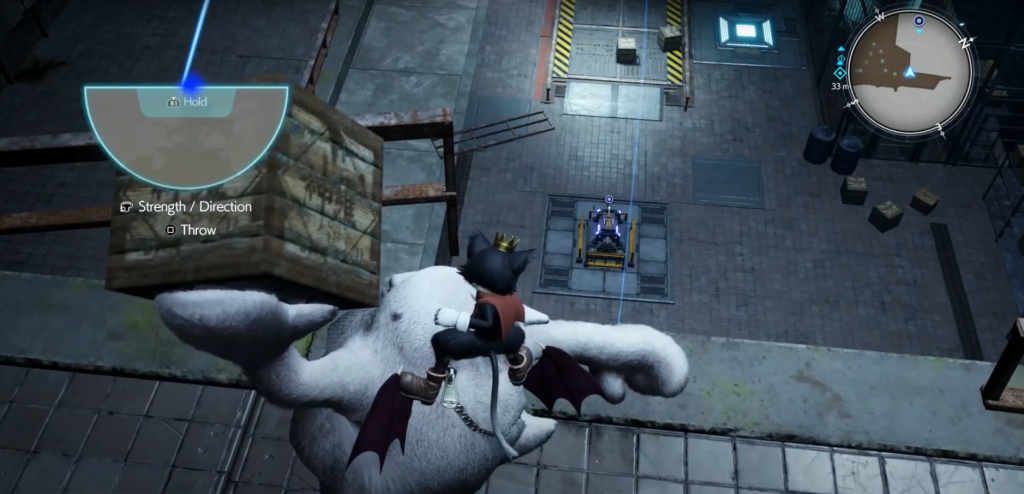
Continue down the tunnel and interact with the terminal. Summon the elevator down, only to be obstructed by a protruding broken pipe nearby. Employ the same strategy as before, summoning and/or grabbing a box to hurl at the pipe and demolish it.
Once the obstacle is removed, interact with the elevator's terminal to ascend. Transition through the rooms until you arrive at the next area.
Here, confront and defeat two Black Bats and a Bahba Velamyu. Then, as Cait Sith, navigate through the air vent in the northeast corner. Subdue the Black Bat and Bahba Velamyu in the subsequent room before accessing the small side room to the south. Within, discover a chest containing a giga-potion and a stack of crates that can be manipulated using L2.
Drag the box into the main room and position it onto the silver plate on the floor where the tire tracks cease. Ascend the steps to the right and activate the blinking pressure plate to release a box from above onto the stack of crates, preventing their destruction.
Retrieve the box and aim it at the switch above the middle generator, marked by a red flashing light. With Barret and Aerith by your side once again, proceed through the corridor to the northeast. Destroy the numerous Shinra boxes along the way, and engage and defeat the 3 Bats before facing the Black Bat and Rictus in the room at the far end.
To the left, spot an orb containing barrier materia on the floor, accompanied by a couple of boxes of mako accelerant. Utilize your Moogle companion to pick up one of the boxes and position it for a throw into the large red saucer on the rotating wheel nearby.
Upon successfully completing this action twice, the generator will be fully powered, opening the gate for your progression. Confront and defeat the 4 Black Bats in the subsequent room after the gate opens.
Following the gate's opening, ride the elevator upward to encounter two Rictus and a Bahba Velamyu in combat. Subdue them, and then utilize the Rest Bench and vending/Folio machines as needed before interacting with the terminal situated to the southwest.

To initiate access to the ducts in the central chamber, activate the lever located at its center. You'll need to employ this lever repeatedly in the subsequent section. Command your Moogle to step on the blinking pressure plate switch adjacent to the lever, causing a box to drop down. Retrieve the box and hurl it at the switch to open the blue ducts.
Navigate through the air duct across the room to reach level 2F, where a battle awaits against two Black Bats. Proceed to the other blue air duct on this level and traverse it to reach 3F, where an encounter with an Adjudicator awaits. From this floor, seize a box (or summon one using the pressure plate), then proceed to the area where the barrier is compromised. Aim your box throw downward to the bottom floor, targeting the lever.
This action unlocks the red duct on this level, allowing passage through it to reach Materials Storage, where two Adjudicators lie in wait. Subdue them, and then access the terminal situated at the top of the ramp to commence lowering the elevator located to your right. However, additional weight is necessary to fully lower it. Utilize the same method to spawn multiple boxes and toss them onto the elevator.
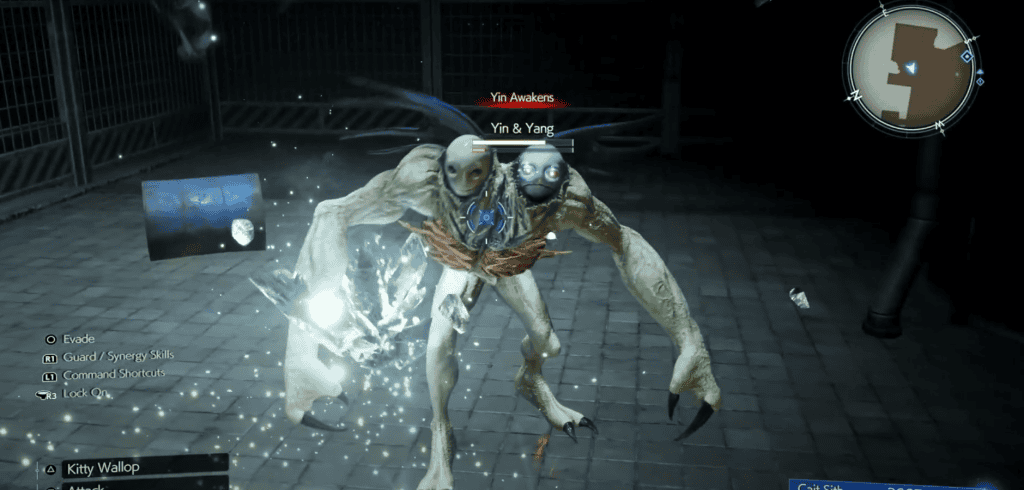
Once three boxes are successfully onboard the elevator, it will descend completely, permitting you to embark. Dispose of or remove the boxes to initiate its ascent. Alight from the elevator and interact with the terminal positioned in the southeast corner of the room, triggering a minor boss encounter with a deformed entity known as Yin and Yang emerging from a nearby containment tube.
Yin and Yang Boss Encounter
Yin and Yang Weaknesses: Fire Lesser/Greater Resistances: Magic (L) Immunities: Proportional Damage, Stone, Morphable Items Enemy Intel: Becomes pressured when either head is incapacitated, but the remaining head will go berserk
Yin and Yang present a formidable yet manageable challenge, being a two-headed entity with distinct aggressive tendencies. Throughout the battle, they alternate control with "Yin Awakens" or "Yang Awakens," each exhibiting different attack patterns based on the head in charge.
When Yang assumes control, it unleashes various spells such as "Blizzard," casting homing ice projectiles, and "Thundara," summoning lightning strikes. These attacks are relatively straightforward to evade or mitigate with precise timing.
Conversely, when Yin takes the reins, it relies more on physical assaults like "Yang Beams," executing a forward flip imbued with magical energy, or "Yang Snickers," delivering diagonal claw swipes also infused with a purplish aura.
"Despondent Strike" is a joint maneuver where Yin and Yang crouch down before executing a 3-hit combo: two consecutive claw swipes similar to Yang Snickers, followed by the same overhead flip kick from Yang Beams. The sequence concludes with a delayed overhead strike using both hands, prompting caution before launching a counteroffensive.

As Yin and Yang near their demise, they unleash their ultimate maneuver, "Yang Takes Aim." With this move, they align themselves and launch directly at you, resulting in a massive explosion upon impact with either you or the ground. The force of this blast can prove fatal if your health is below 30-40%, necessitating extreme caution. It's crucial to swiftly retreat as soon as the attack initiates to minimize damage. Notably, this explosion can also deal significant damage to Yin and Yang simultaneously, often concluding the battle.
Yin and Yang Encounter Rewards:
- Experience Points: 3,700
- Ability Points: 10
- Gil: 1,850
- Party Experience: 50
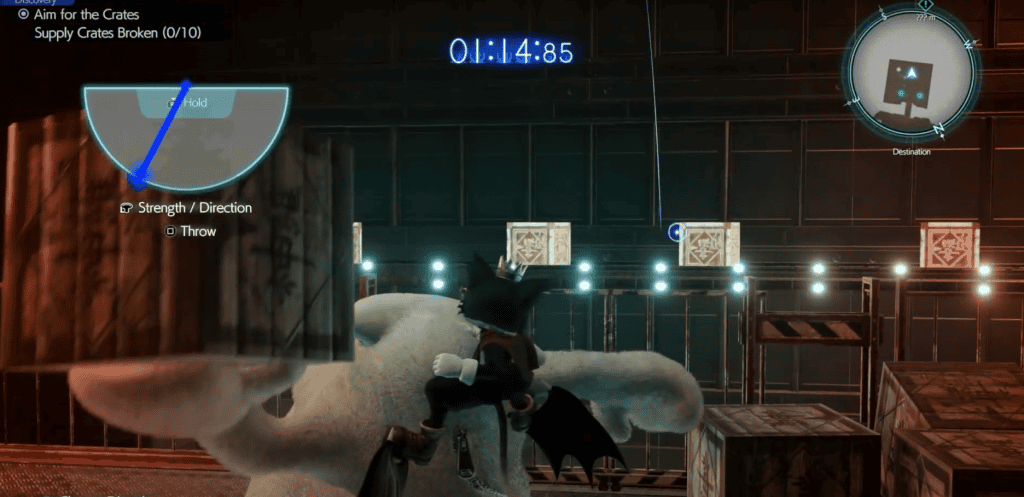
Upon overcoming Yin and Yang, Aerith and Barret reunite with you. Proceed forward and utilize the elevator. During the ascent, the elevator halts, presenting an optional activity. You have the opportunity to throw boxes to break the crates positioned on the treadmill across the room. Whether or not you manage to break the "required" 10 crates, once the timer expires, the elevator resumes its ascent.
Upon reaching the top, you'll enter a spacious chamber housing a Rest Bench and vending/Folio machines. Approach the terminal adjacent to the locked door, and Hojo taunts you, tasking you with locating the code required to unlock the door somewhere within the room.

Employ your moogle to shift the initial set of wheeled crates on the room's eastern side, revealing the code inscribed on the wall:
Code: 36 10 59 97

Return to the door and input the code by adjusting each dial accordingly. Upon successfully entering the code, the door swings open, leading you into the next chamber. Here, Hojo continues to taunt you as you come face to face with a colossal creature known as the Forgotten Specimen.
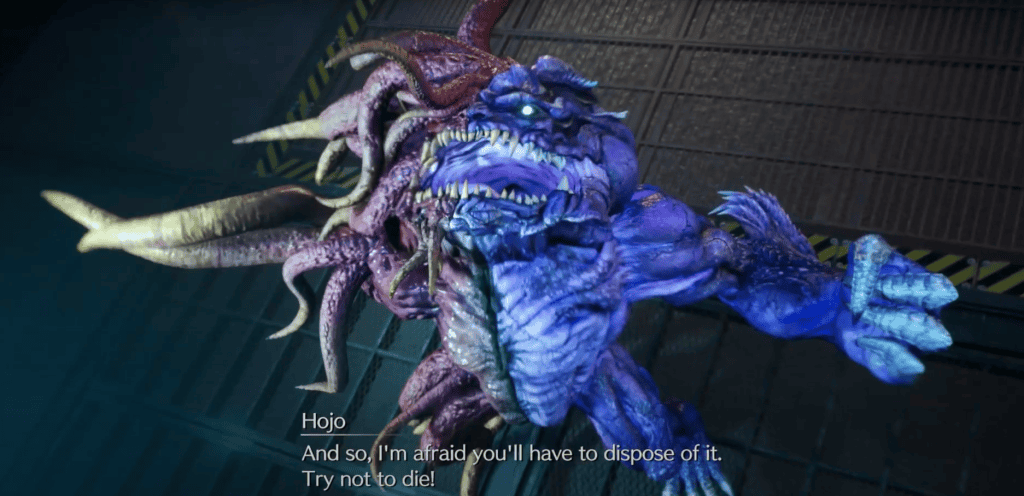
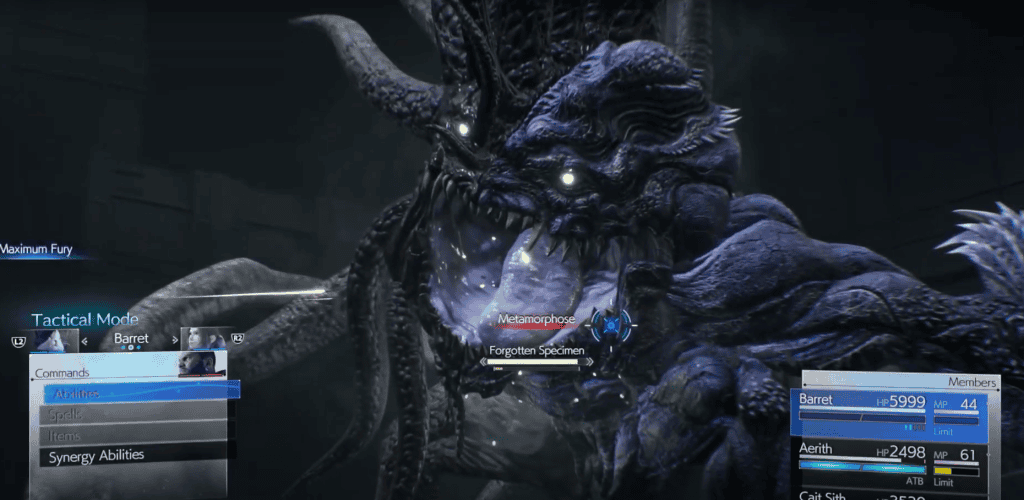

As such, prioritize utilizing MP attacks or any magical non-MP-consuming abilities you've unlocked to deal chip damage until you see the blue shield beneath its health bar disappear.
- "Mako Ooze" involves the Specimen firing a liquid blob of mako that spreads upon impact with the ground, creating a persistent poisoning hazard on the floor for a considerable duration afterward.
A particularly formidable combo attack is "Wild Frenzy," during which the Specimen slashes back and forth with each arm in horizontal swipes, totaling six swipes before delivering a final delayed punch into the ground, resulting in an explosion.
If caught in this combo, escaping is challenging if not outright impossible until the combo concludes, so exercise caution. The Specimen typically pauses briefly before initiating the swipes, allowing time to retreat backward and avoid the onslaught.
- "Malice of the Lost" is another explosion-based attack in which the Specimen punches the floor, generating a singular, relatively contained explosion. Although posing less of a threat than attacks with wider ranges or blast radii, it's prudent to steer clear as the Specimen approaches to execute this move.
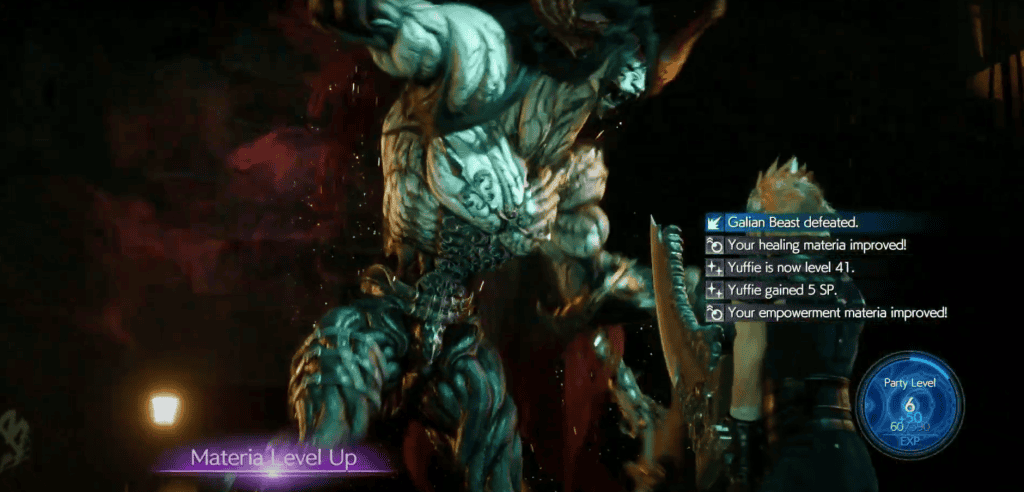
3,700 EXP, 10 AP, 1,850 Gil, 50 Party EXP

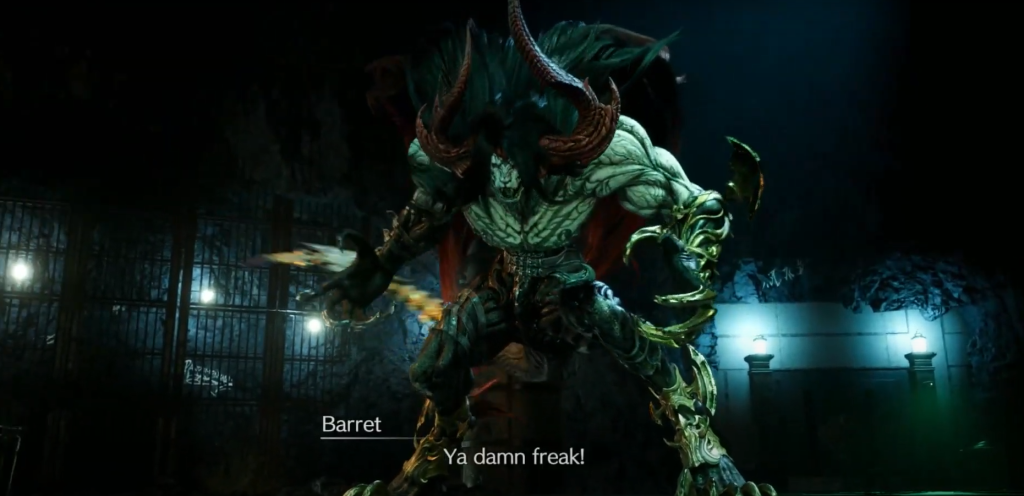
- "Savage Beast" stands out as the Galian Beast's signature combo attack, one that demands particular vigilance. In this assault, it lunges at a party member, immobilizing them for a brief period. Should the hold not be broken in time, the Galian Beast proceeds with a relentless series of swift slashes and swipes from its claws and tail.
- "Flying Debris" where the creature rushes to the room's perimeter and hurls debris in your direction. Similarly, "Bestial Flare" manifests as the Galian Beast conjures a large fireball, launching it towards you. Both attacks are manageable with constant mobility, especially along a horizontal axis.
- "Primal Roar" unleashes an area-of-effect shockwave as the Galian Beast leaps towards you, emits a thunderous roar, and generates a damaging shockwave. Due to the attack's swift initiation, evasion is practically impossible, necessitating reliance on blocking to minimize harm.
- "Skull Crusher" involves the beast soaring into the air before crashing down on all fours. Familiar with this maneuver, you'll need to execute a timely roll to evade its devastating impact.

Throughout the battle, the Galian Beast relies on "Inner Turmoil," a phase where it advances towards you with a crimson aura. Attacking during this state prompts a devastating "Counter," where the beast retaliates with acrobatic flips, launching you or a party member into the air before slamming them down with its tail.
At approximately 50% health, the Galian Beast enters an enraged state, intensifying its aggression and agility. Existing attacks gain additional fiery energy, with rapid swipes and slashes requiring constant movement, active lock-on, and instantaneous blocking.
During this heightened phase, the Galian Beast scales the arena walls, unleashing ranged assaults such as "Bestial Flare" and the new "Wall Dive." The latter involves a powerful leap from the wall, followed by a claw swipe and an uppercut. While the initial jump can be dodged, subsequent attacks are blockable with swift reflexes.
As its health dwindles to around 25%, the Galian Beast executes "Chaotic Impulse," wielding a massive pillar to sweep across the arena's width. However, by retreating directly away from the beast as it initiates the attack, you can safely evade its reach.
"Chaos Flare," a variation of Bestial Flare, sees the beast leaping onto a wall and launching a red orb into the arena's center. Upon landing, it triggers a colossal shockwave of red energy. Dodging the initial orb and swiftly retreating to the outer arena perimeter barely avoids the subsequent wave.