FF7 Rebirth Walkthrough – Chapter 3 – Deeper Into Darkness
Chapter 3 - Deeper Into Darkness
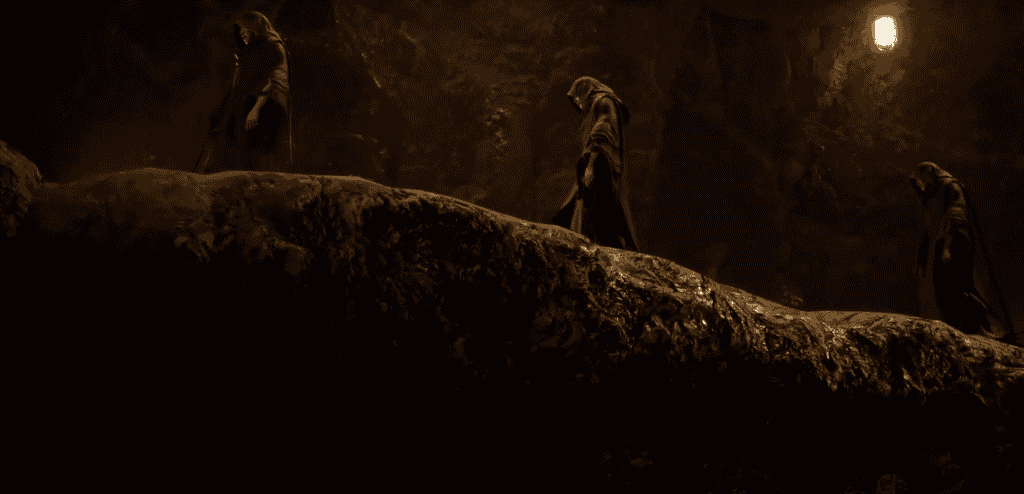
Now in the Mythril Mines, head along the linear path and you’ll arrive at a Rest Bench, which you should make use of. Just beyond the bench you’ll spot three robed figures across the bridge, and as you approach the ground will collapse beneath one of them, potentially sending them to their death.
Though Cloud insists on pushing on, the rest of the party deliberate. Barret and Red XIII agree to go check on them, and Tifa and Aerith will remain with Cloud. Continue along the path curving around to the right and defeat the two Crawlers just down the steps.
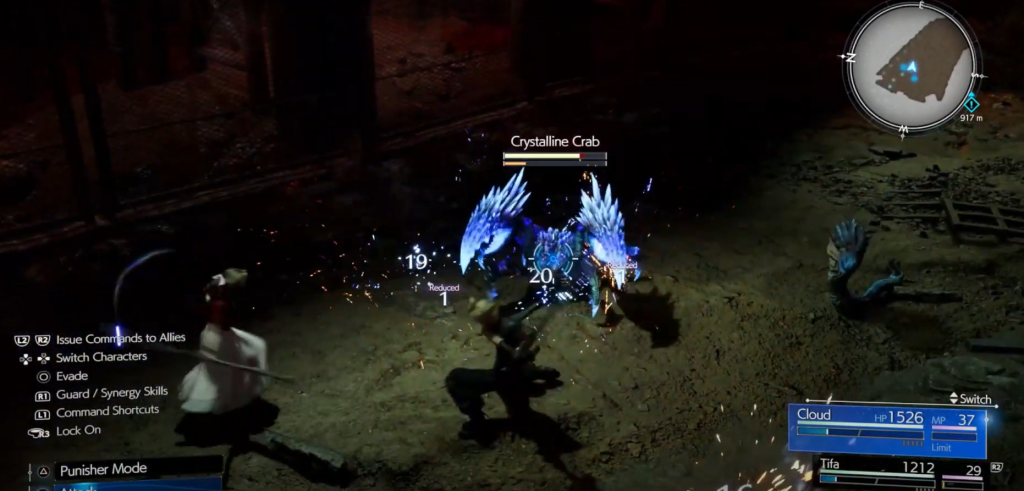
Climb up the broken steps to the right and squeeze through the gap in the fence, proceeding along the walkway, collecting the clearly visible orb of AP Up materia before going down the ladder. In this arena you’ll fight two more Crawlers and a Crystalline Crab. After all three are dead, open up the chest by the next ladder ahead to receive a pair of sylph gloves.
At the base of the second ladder, you can head south and fight the 4 Crawlers you’ll find in order to loot a chest against the back wall containing a bottle of ether. Other than that, you’ll want to head west down into the tunnel beneath the “Workers” sign.
A short while down the tunnel you’ll find 3 Crawlers to the left, and beyond them you can head up to the right, or down to the left. Down to the left you’ll find some materials in wooden crates, and up to the right you’ll find an Ogre patrolling the path.

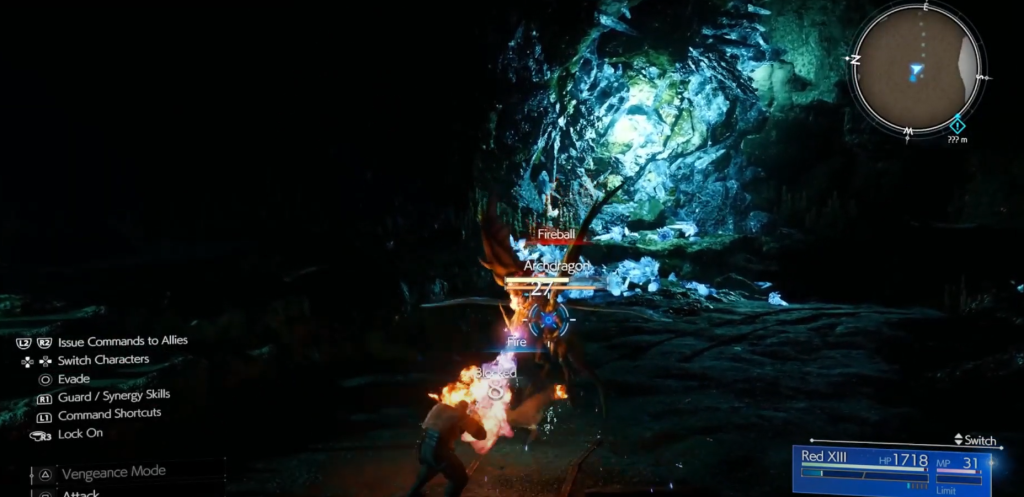
After defeating the Ogre, continue south down the tunnel and you’ll find an Archdragon in an alcove to the left which you don’t have to engage with if you don’t want to, though a chest containing 5 chunks of iron ore is available if you do.
Continuing down the tunnel, you’ll find a large mine cart blocking your path. Press and hold L2 to grab and pull the minecart backward so that you can proceed, letting go once you’ve got enough space to get past.
Emerging into a giant cavern, head left across the bridge and defeat the Crawlers in the vicinity. With the area clear, head to the far side to find another minecart on the tracks. Grab a hold of it with L2 and drag it a little down the track so that it sits in front of the broken ladder. This allows you to vault up onto the minecart and use it to reach the bridge above.
Cross over the bridge and go up the ramp, heading left to confront two Ogres. After killing them both, climb the ladder and go up the slope to reach another Rest Bench, Folio Upgrade machine, and Energy Drink vending machine. After resting and/or upgrading, head up the stairs and you’ll begin to overhear a conversation.
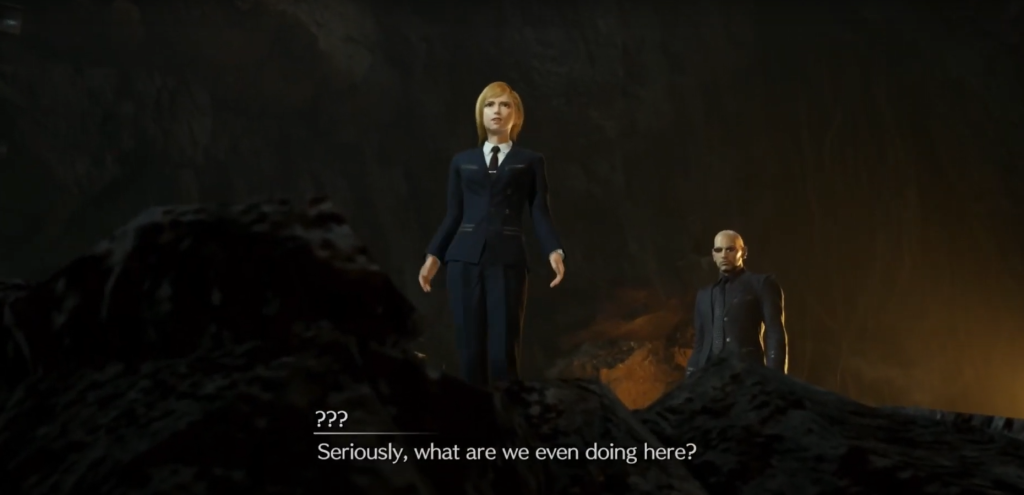
Approach the tree roots and you’ll see two Turks, revealed to be Elena and Rude, contemplating why they’re following orders to investigate the hooded figures. As the pair discuss killing the injured hooded man nearby, Tifa swears and reveals their position, initiating a fight.
Elena and Rude Boss Fight
Fighting two combatants at the same time that are incredibly agile seems daunting, but the rest of your party will preoccupy either Elena or Rude the majority of the time as you prioritize the other.
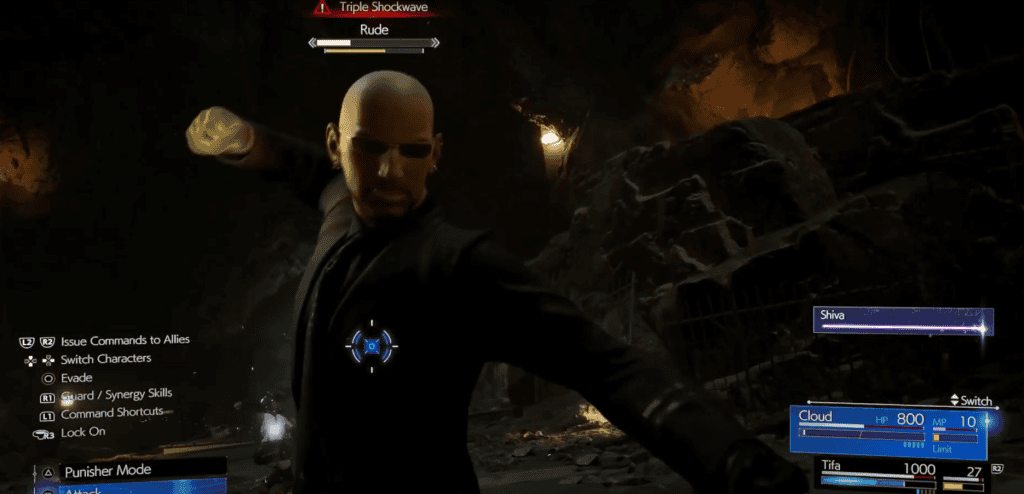
Rude relies heavily on “Shockwave” attacks in which he will slam his fist into the ground in front of him and send out a straight line of energy through the floor in your direction.
This extends to variations like “Triple Shockwave” where three beams will fork out that you’ll need to position yourself properly to avoid. Elena is the far more agile of the two, and can leap up to a platform above the arena and trigger “Stun Grenade” in which she’ll continually throw out grenades that spark electricity, temporarily stunning you if you get caught in the blast.
Be sure to make liberal use of your dodge to maneuver around the arena and give yourself the best chance of avoiding the explosions.
As you deplete their health, both Elena and Rude will be forced to the edge of the arena and both will begin charging up; Rude with “Atlas Stance” and Elena with “Petite Powerhouse”.
If you’ve made efficient use of your Abilities, Synergies and Limit Breaks, you should be able to easily Stagger one of the two before anything happens. Elena is the easier of the two to Stagger and ultimately defeat, so if you can it’s worthwhile prioritizing her.
After whittling down the rest of Rude’s health, Barret and Red XIII arrive and hold them in a standoff as Elena clutches a grenade. Before anything can happen, Tseng (another Turk) appears high above and shoots the robed figure before turning the gun at Barret. Tseng suggests both parties stay out of each other's way, and asks Cloud to take care of Aerith specifically.

Tseng fires at Barret and Elena pulls the pin on the grenade and kicks it at Cloud, with Red XIII propelling it away at the last minute. As the Turks escape, the ground collapses beneath the party, sending them tumbling further into the mines.
Mythril Mine - Mine Depths
During the fall the party became separated, with Barret and Red XIII plunging furthest down into waters below. With Cloud, Aerith, and Tifa high up above, Barret assures the others that they’ll find a way up and meet them at the exit of the mines. Red XIII spots the corpse of a robed figure and laments that they are Mako poisoned and were abundant in Hojo’s lab.
Assuming control of Barret and Red XIII, head forward and you’ll find a Rest Bench with the usual vending machine and Folio upgrade opportunities. Throughout the cave you’re in you’ll have the ability to shoot various crystals off the cave walls to collect resources. Inside the chest near the Rest Bench you’ll find a Renegade’s Collar.

Up ahead you’ll find two Flan that you’ll need to face off against, and luckily both Barret’s ranged attacks and Red XIII’s melee easily build up stagger. After defeating them, head up the slope and Red XIII will note a large tree in the distance that could be used to climb up and out of the mine.
Feel free to explore the caves below for additional resources and Flan encounters, but to progress you’ll want to keep to the high ground and approach the tree trunk in the distance. This will confront you with another Flan and a Crystalline Crab. Keep in mind that Barret is excellent at staggering the Crab, though neither enemy should pose too much of a threat.
Continuing up towards the tree trunk, you’ll find two more Flan. After dispatching them, approach the handholds of the tree and begin to climb.
Partway up you can take a handhold path around to the right where a platform with several resources can be found. Reach the top and climb up onto the next platform where you can use Barret’s minigun to destroy the large grey rocks blocking your path.
The only obligatory one is on the far right, as it blocks the way to the next set of handholds on the tree. Climb the handholds up to the top to reach the excavation site.
Excavation Site
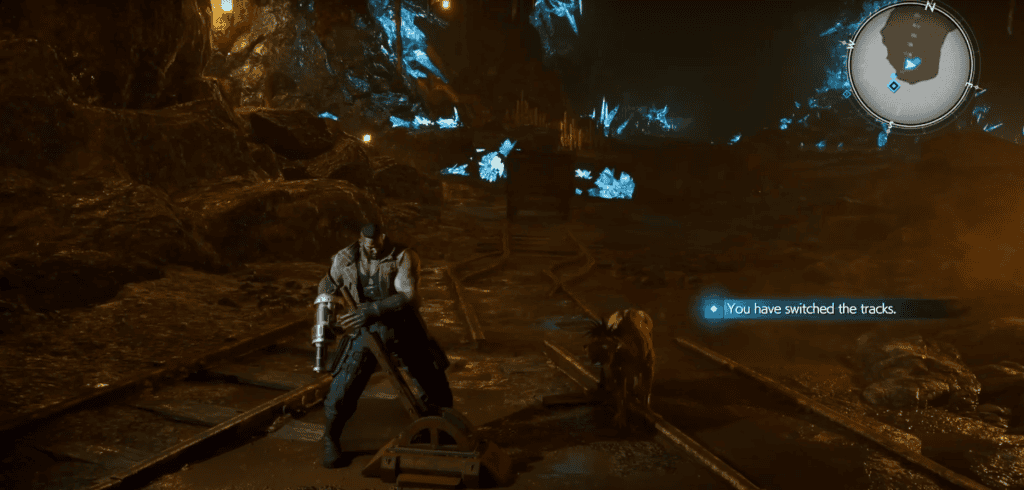
Proceed into the tunnel ahead and you’ll find an Archdragon, and beyond that take the path to the left to fight two Crawlers. Once they’re dead, be sure to open the chest to obtain 5 beast bones. Continue up the slope and you’ll find a minecart as well as a lever to switch the position of the rail tracks.
While you can push the minecart along the tracks without switching them, which will allow you to reach a chest containing a bulletproof vest for Barret, you’ll want to have the minecart in its original position and then pull the lever. You can then push the minecart up to the top of the tracks and climb up.
Through the tunnel ahead, you’ll emerge into a spacious area with an Ogre. Defeat the Ogre and follow the tracks around to the right, using Barret’s minigun to break the large rock blocking the path.
You’ll then see the rest of the party across the way, unable to proceed because the bridge is out. After regaining control, head left and look up to the two ladders above, holding  to shoot down the ladders and allowing you to climb up.
Heading up the right ladder gives you a chest to loot with 1,000 Gil. Climb the ladder on the left to find a Rest Bench and 3 Crawlers.
After defeating the Crawlers, pull the lever by the closed gate to open it. You can then push the minecart out of the room and let go to shoot and destroy the large rock blocking the tracks.
Push the minecart along the tracks and you’ll arrive at another lever. Before letting go of the minecart, push it into the alcove on the right.
Now pull the lever to switch the tracks and pull/push the minecart along the new path, letting it run off the edge to dislodge the trapped crate, bringing up the bridge for the rest of the party, who thank you and depart.

Return back across to the room with the Rest Bench and Aerith up above will pull a lever that’ll let you exit out the other side of the room. Grab the orb of lightning materia in front of you, and then go down the slope and drop into the Mythril Cavern below, where something primordial stirs to confront you.
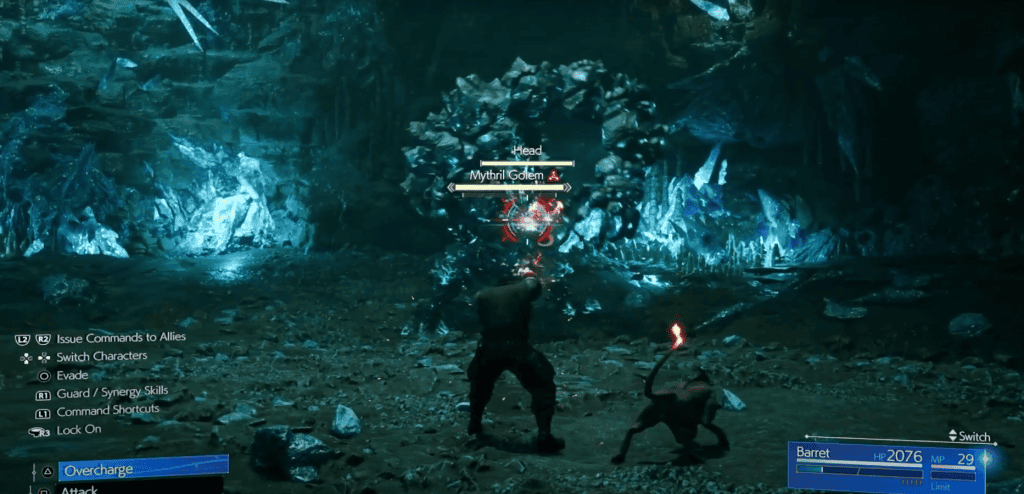
Mythril Golem Boss Fight
The Mythril Golem is composed of dozens of chunks of magically-infused rock, and you might expect that to make the fight pretty tough, but in reality the Mythril Golem shouldn’t pose much of a threat at all. The Golem is slow moving most of the time, and as such you can comfortably stay as Barret for large chunks of time and chip away at the Golem’s health without much danger.
One of the moves that the Golem will use often is “Sweep”, in which it’ll sweep one of its arms horizontally in front of itself, kicking up dust and rock in the process. If you’re moving whilst attacking, you’ll have no problem being completely out of the sweeps radius by the time the attack is executed.
“Crush” is a basic attack with an overhead slam/punch into the ground that lightly homes in on your position. Another attack is “Leaping Strike”. The attack begins with a long wind-up animation where the Golem will crouch down before pouncing up in the air. A dodge can be difficult to time, but will be needed as the Golem will almost immediately crash back down on your location.
After recovering from being staggered for the first time (around 75% health), the Golem will likely launch into the “Mythril Mallet” attack. This begins with digging its hand into the ground and pulling out a large cluster of glowing blue rocks. The Golem will then perform an overhead slam in your direction with the cluster, prompting a radial explosion.
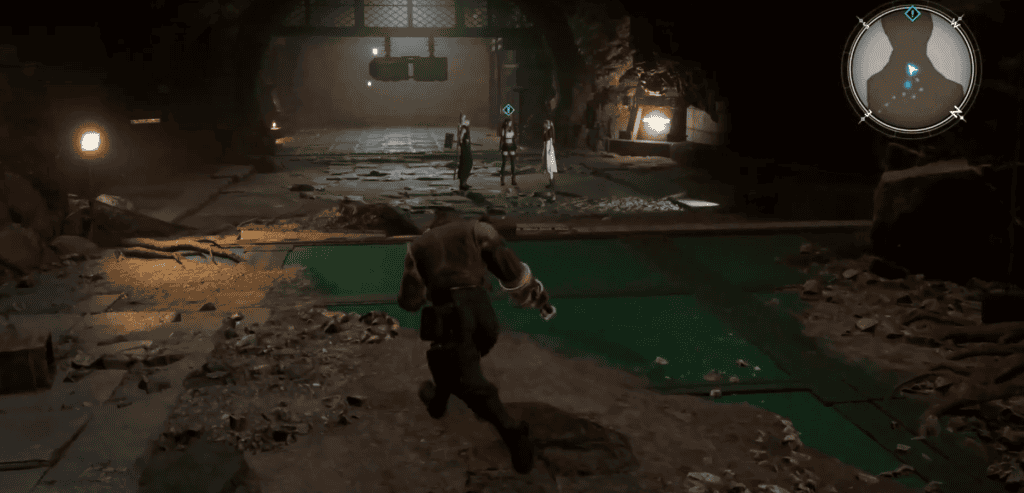
Upon defeating the Mythril Golem, it’ll fall into pieces and a slope leading up out of the arena will be revealed. Go up the slope and follow the path curving around to the left. As you drop down onto the rocks off of the metal platform, climb up the ledge on the left and you’ll see Cloud and the rest of the party ahead.
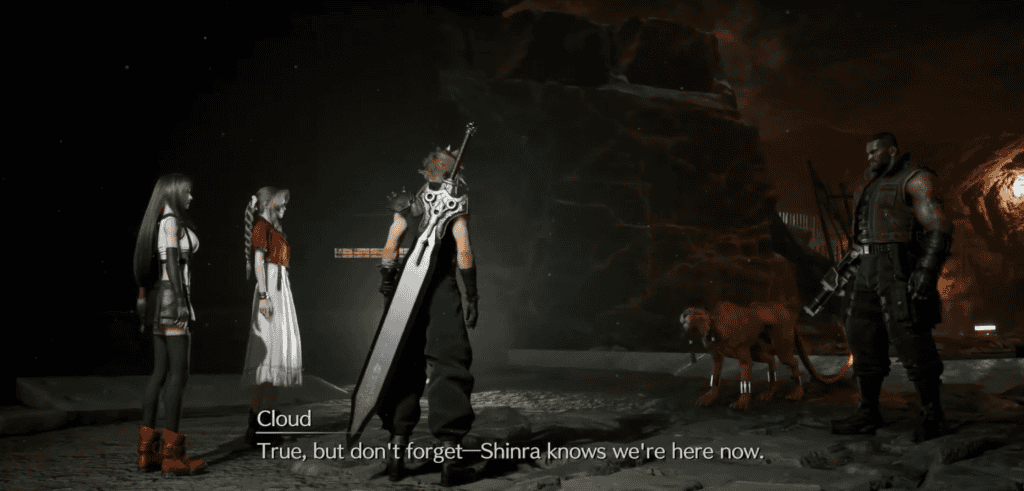
Cloud laments that Shinra knows that the party is here, but Barret exclaims that after the cataclysmic vision they experienced in Midgar, they have a duty to push on regardless and ensure they save the world. Agreeing to continue tailing the robed figures, head forward through the tunnel and you’ll eventually run into two Ogres. After defeating them, continue sloping up the path and as you get a taste of daylight you’ll encounter two Crawlers.
Wrapping around the final part of the tunnel to the right, you’ll emerge outside near the city of Junon.
Enjoyed this article? Share it with your friends on social media and spread the word!