FF7 Rebirth Walkthrough – Chapter 14 – End Of The World

As the helicopters transport the Turks, Rufus, and Hojo back to Midgar, discussions between Hojo and Rufus ignite about the expansion of Shinra's ambitions. Amidst this, Zack faces a pivotal decision before descending into the Corkscrew Tunnel: Does he race to prevent the reactor explosion with Biggs, or does he divert to Shinra HQ in search of a cure for Cloud?

zack makes a decision

Reflecting on his conversation with Marlene regarding Aerith's fate, Zack opts to prioritize Cloud's well-being and heads towards Shinra HQ. Meanwhile, an iridescent stream of lifestream cascades down the alternate tunnel track. Within Aerith's ethereal realm, Cloud awakens from his wheelchair, realizing they exist within her dream.

Descending to join Aerith outside, they observe a peculiar tear in the sky. Despite the ominous atmosphere, Aerith exhibits unusual behavior, prompting Cloud to select a gift for her from a nearby stall. Presented with three options - a pink hairclip, a gold bracelet, or a stamp figurine - Cloud's choice leads to a token of appreciation from the vendor, albeit tinged with melancholy.

cloud buys sweets

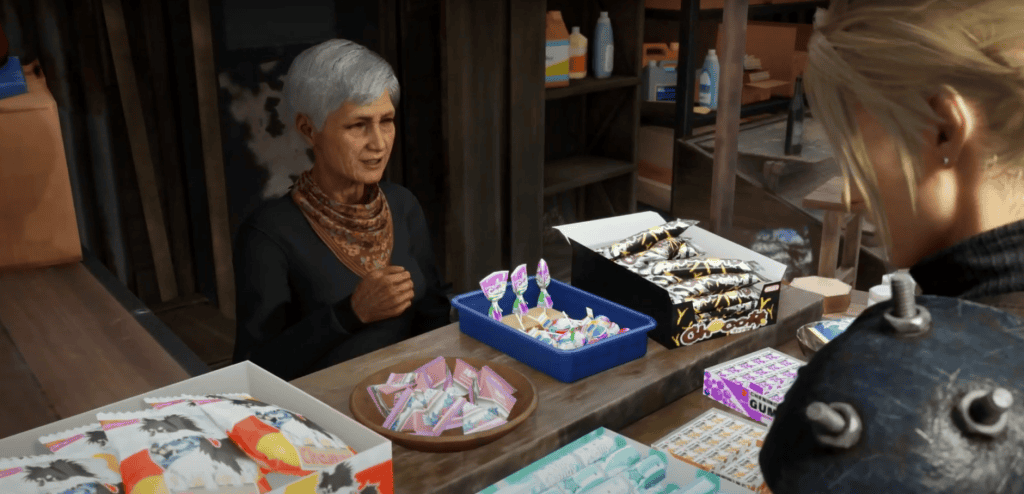
Aerith guides Cloud to a candy stall, offering another choice, yet the outcome remains unchanged regardless of selection. Expressing gratitude for the treat, the vendor laments the fleeting nature of time. Meanwhile, in the lobby of the Shinra building, Zack boldly confronts a platoon of troopers, racing towards them on his bike with unwavering determination.

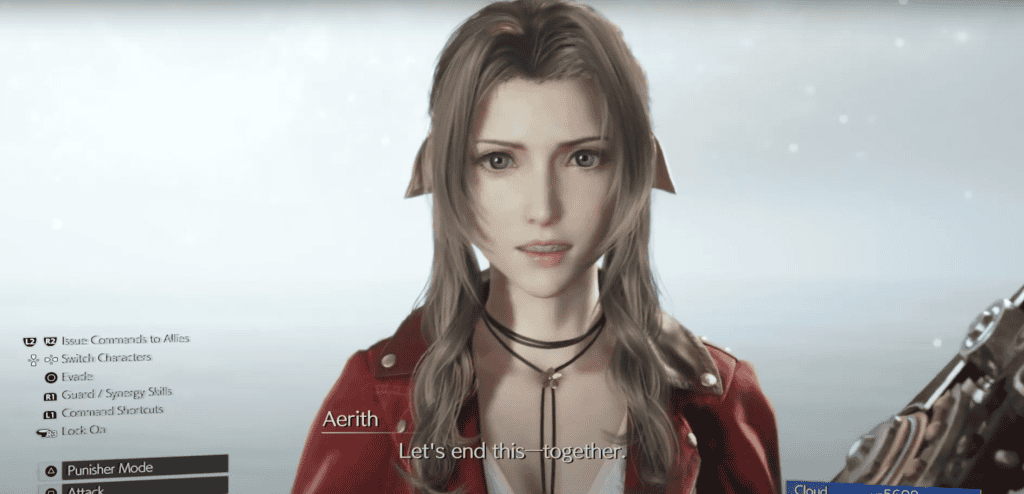
Returning to Aerith and Cloud, she senses Sephiroth's presence as he declares his discovery of her in a world resigned to its fate. Leading Cloud to a photographer, they engage in a lighthearted competition to strike the best pose for a picture. Amidst the camaraderie, the screen briefly flashes white, marking a transition.

strike a POSE

In the depths of the Sector 6 Reactor, Zack encounters Biggs, who reveals the grim reality: the reactor lies dormant, and the lifestream has been depleted, spelling doom for the planet. In a moment of inadvertent action, Biggs dislodges the explosive, leading to an anticlimactic detonation below.

Despite the dire circumstances, Zack offers reassurance to Biggs, affirming his value and the care of those around him. Tragically, their exchange is interrupted by a fatal gunshot, claiming Biggs' life. Surrounded by Shinra troopers, Zack charges forward, plunging into the depths of the reactor.

zach watches biggs die

Returning to the photographer's scene, Cloud presses Aerith for clarity on the unfolding events. Promising to elucidate once they reach their destination, Aerith leads the way, prompting another fleeting flash of white.

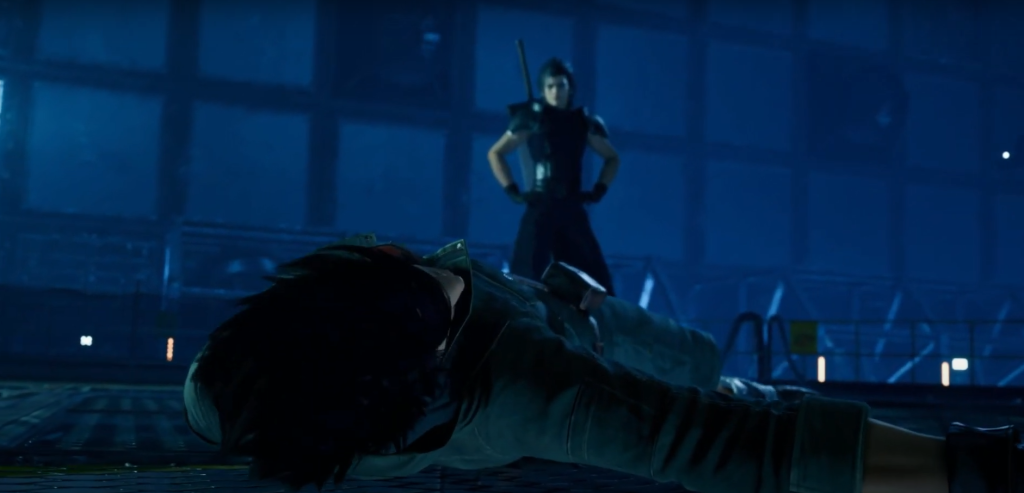
Outside the Sector 5 church, Zack sits in contemplation as Sephiroth calmly passes by. Confronting the enigmatic figure, Zack's defiance is met with a swift strike, creating a rift in the floor that ensnares him, pulling him down into the depths with the assistance of Whispers.

Amidst his fall, Zack finds himself guided by White Whispers towards a distant light, accompanied by drifting yellow flower petals. Meanwhile, within the church, Aerith bares her heart to Cloud, expressing her profound care before entrusting him with her white materia. Their exchange is abruptly interrupted as Aerith pushes Cloud through a portal in the floor, just as Sephiroth makes his ominous entrance.

clouds falling into a portal

As Cloud descends, Sephiroth engages him in a conversation about the intricate nature of the planet, emphasizing the emergence of myriad worlds and timelines as the "boundaries of fate are breached". He elaborates on the inevitability of worlds perishing, portraying it not as death but as a return to their origins.

Upon landing in a somber forest, Cloud encounters Whispers hovering before him. Dispatching the trio of Whispers ahead, he presses onward along the path, confronting and defeating additional Whispers that materialize. Venturing deeper into the forest, Aerith emerges, urging Cloud to focus on self-discovery while she confronts Sephiroth. Surrendering the white materia to her, Cloud receives a translucent orb in exchange.

cloud fights the whisperes

Following Aerith's departure, Cloud finds himself overwhelmed by an increasing swarm of white Whispers. Yielding to the onslaught, he follows instructions to press and hold R2 and L2, succumbing to a fade to white. Awakening with Aerith after their descent, Cloud learns that she proceeded ahead alone. As they regain their bearings, Red XIII mentions Aerith's journey to an ancient city in pursuit of a sacred altar.

cloud recieves an empty orb

Traversing the Sleeping Forest, each party member takes a moment to converse with Cloud along the way. Upon reaching the forest's end, they are greeted by the sight of the Forgotten Capital below.

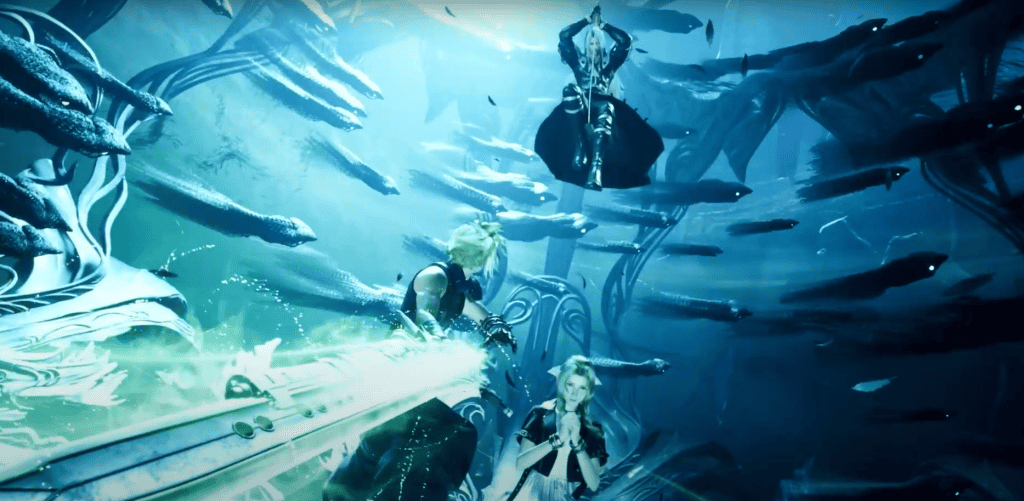
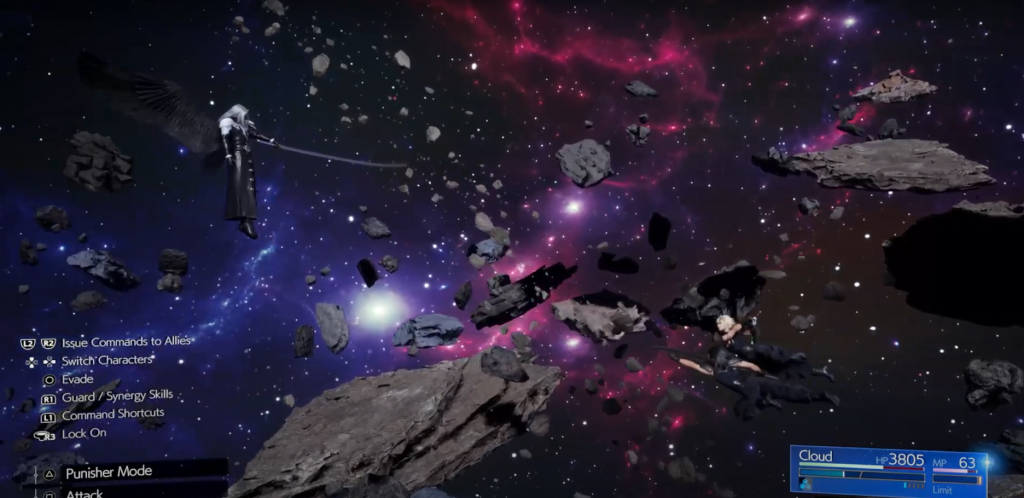
As the group advances, Sephiroth manifests with overwhelming power, tearing open a rift in the sky. The merging of worlds commences as the lifestream pours forth, marking the onset of the reunion.

sephiroth opens up a portal

Navigating down various ledges, the party confronts four white Whispers, defeating them to progress. Despite the Whispers' obstruction at the structure's entrance, the party resolves to forge ahead, creating a narrow opening for Cloud to breach through.

Within the Planet's Sanctuary, they descend a slope and board an elevator that materializes in the platform's center. Arriving at the elevator's base, they discover the final Rest Bench and vending/Folio machines tucked away in the alcove to the left.

Once prepared, ascend the steps steadily, pressing forward as the Whispers assail you. Eventually, you'll find Aerith in prayer. Hold R2 and L2 as instructed to close the distance in the final steps. The Whispers converge around Cloud's sword, compelling it skyward against his will. To resist, repeatedly press L2 and R2.

cloud rescuing aerith

As Aerith concludes her prayer, Sephiroth descends with sword drawn, poised to strike. Cloud intervenes, halting the blade just before it reaches Aerith, unleashing a burst of multicolored light.

aerith dies

With the blade diverted, the Whispers disperse, allowing the party to rush inside. The screen distorts as blood cascades, and Sephiroth withdraws his sword from Aerith's back. She collapses, her white materia tumbling into the water below. Cloud cradles her as Sephiroth laughs, the screen flickering.

cloud cuddles aerith

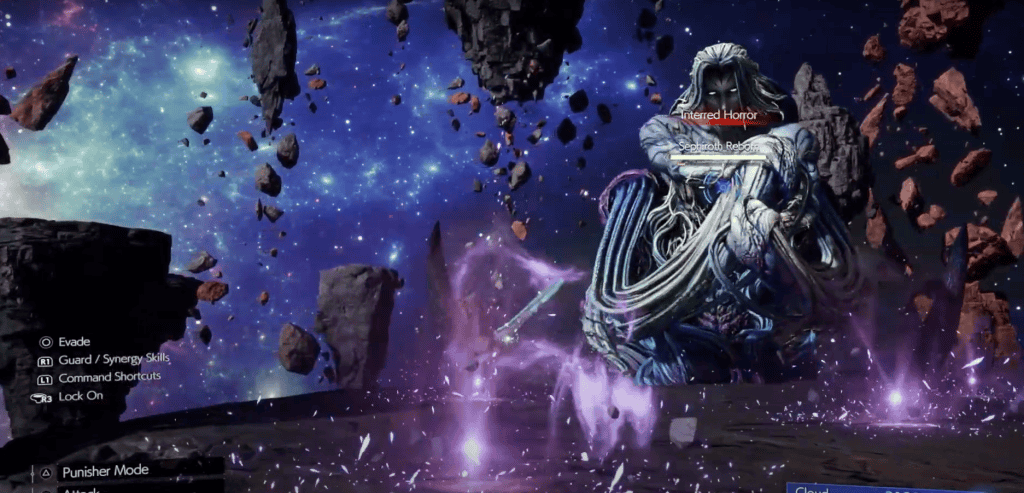
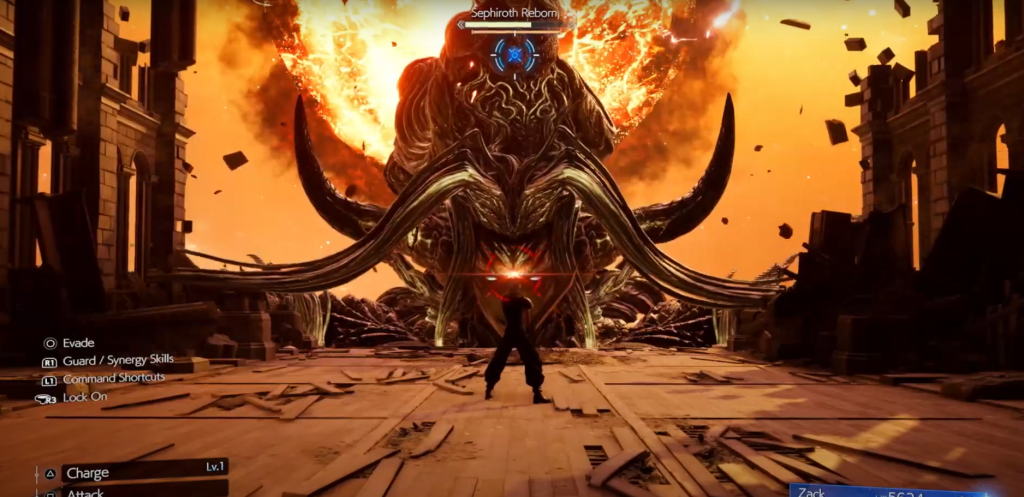
Aerith assures Cloud of eventual solace as the others arrive, visions of realities stained with blood flickering before them. Sephiroth remarks on the convergence of disparate realities, and as the party readies for battle, a menacing form of Jenova, dubbed Jenova Lifeclinger, emerges.

Jenova Lifeclinger Boss Fight

jenova lifeclinger

  • Weaknesses: N/A
  • Lesser/Greater Resistances: Ice (L), Wind (L), Stop (G)
  • Immunities: Proportional Damage, Poison, Stone, Morphable Items
  • Enemy Intel: N/A

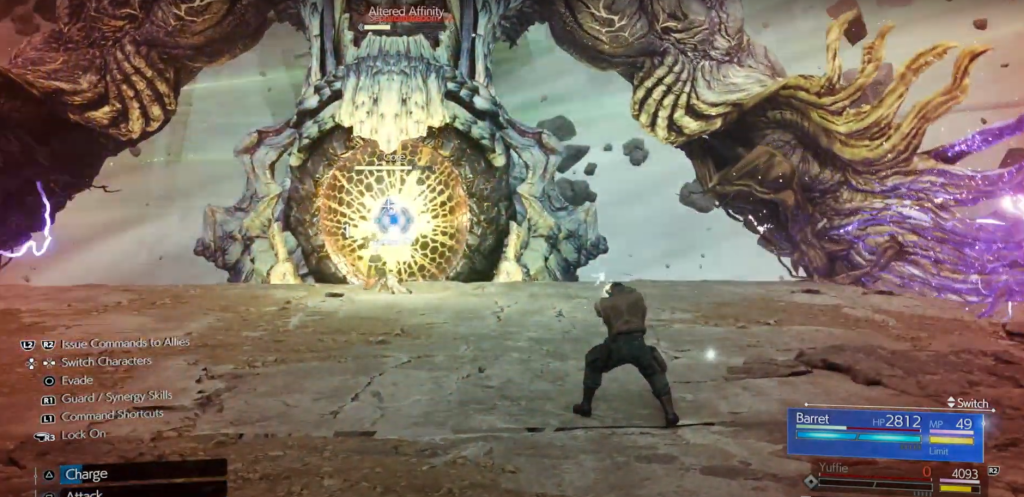
Jenova Lifeclinger, a towering entity, poses a significant threat despite its limited mobility. The battle commences with "Contaminant Expulsion," wherein Jenova draws in three party members before explosively ejecting them, temporarily removing them from the fight.

the death of jenova

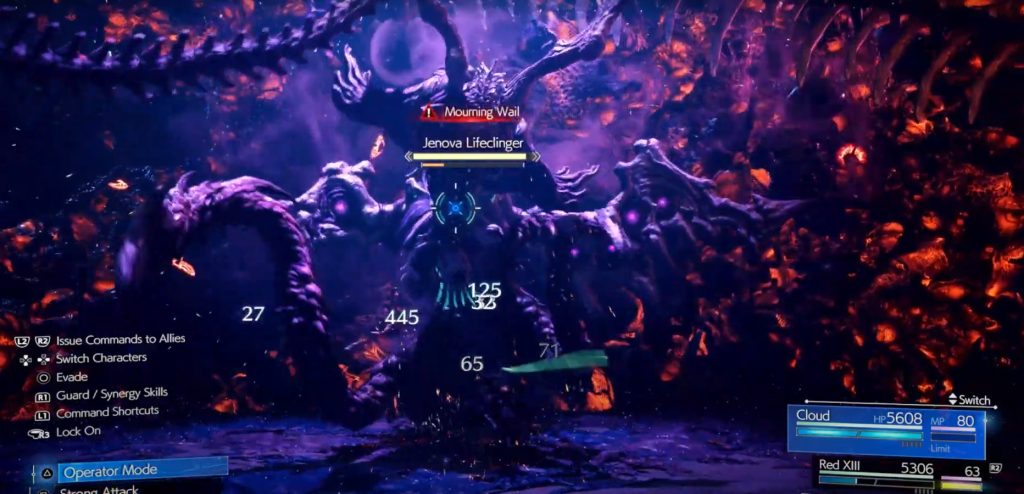
Initially, Red XIII, Barret, and Cait Sith are targeted. This process repeats later in the encounter, with one active party member being removed each time. When Jenova reaches approximately 75% health, it executes this move for the final time, leading to a 1v1 scenario.

During "Azure Resplendence," Jenova embeds two tendrils into the ground before unleashing blue flames that traverse the arena floor towards you. While dodging is possible as the flames approach, staying airborne through attacks allows you to evade the flames entirely.

Jenova employs ranged attacks such as "Vengeance," wherein it launches numerous purple beams rapidly from its wings. Maneuvering and changing direction can mostly avoid this onslaught.

jenova upgrade

Another tactic, "Eye of Providence," involves Jenova summoning a blue orb that detonates upon reaching your position. Moving keeps the orb behind you, and its explosion radius is minimal.

Jenova Lifeclinger has the ability to vanish into the floor and reappear elsewhere along the arena's perimeter. Staying locked on helps in tracking its movements. Additionally, it can strike with a vertical tendril descent followed by a horizontal sweep across the floor.

Periodically, Jenova Lifeclinger erects a fleshy barrier, rendering it impervious to damage. Breaking this barrier with spells like Fira immediately pressures Jenova, rendering it vulnerable.

"Mourning Wail" constitutes an area-of-effect attack where Jenova rises, roaring and emitting a shockwave that can knock you back. It leaves behind a swirling vortex, creating distance between you and Jenova momentarily.

jenova upgrades again

Similarly, "Castigate" unleashes a toxic cloud around Jenova, which can be evaded by maintaining distance or staying airborne.

A rarer move, "Lachrymal Exhale," involves Jenova spewing large toxic bubbles across the arena. To evade, swiftly move to the opposite side of the attack's origin and position yourself alongside Jenova.

Around the 50% health mark, Jenova shatters the arena's boundaries, allowing your party to rejoin the fray. With extended wings, Jenova introduces new ranged attacks, such as firing small blue homing projectiles and raining them down from above. It also emits large red beams that persist, requiring you to stay centered until they dissipate.

the final battle

During the battle, Jenova unleashes "Desecration," unleashing a barrage of smaller red lasers from its lower wings. These lasers strike the floor before gradually ascending to the opposite side of the arena. While the projectiles are sporadic, they often pose minimal threat, requiring little action to evade major damage.

As Jenova's health dwindles to around 25%, it destroys the arena floor, sending party members plummeting alongside it. Initially, Tifa and Cait Sith engage, focusing their assault on the Right Wing. Utilize Limit Breaks, which charge rapidly during these segments, for all party members.

Following the Right Wing's disablement, control shifts to Barret and Red XIII, who target and attack the Left Wing with their Limit Breaks. Finally, Cloud and Yuffie concentrate their efforts on the Head.

With each segment incapacitated, the party executes a series of coordinated team-up attacks in freefall, driving Jenova Lifeclinger into the ground below. In its final phase, Jenova unleashes "Sanguinary Flames," spewing multiple flaming red fireballs from its mouth. These projectiles spiral downward, homing in on their targets.

jenova defeated

Upon victory, the party earns 3,300 EXP, 10 AP, 2,200 Gil, and 50 Party EXP.

After the intense battle with Jenova Lifeclinger, a swarm of Whispers envelops the area, restoring your HP and MP to their fullest. Amidst the flurry of light, Zack finds himself in an empty expanse of white, where he catches sight of Cloud, motionless in the distance.

Rushing to Cloud's side and making contact, they are both suddenly transported to an unfamiliar realm, where Sephiroth awaits, ready to confront them once more.

Sephiroth Boss Fight

sephiroth battle

Weaknesses N/A

Immunities Proportional Damage, Berserk, Deprotect, Deshell, Debrave, Defaith, Slow, Stop, Poison, Silence, Sleep, Petrify, Stone, Morphable Items

Enemy Intel: N/A

Facing Sephiroth is the ultimate test of your skills, as he proves to be the most formidable adversary in the game. His swordsmanship is unmatched, delivering a flurry of slashes and strikes that can quickly deplete your health if you're not careful.

With Zack by your side, you have the advantage of perfect blocking his attacks and accelerating the stagger process. Sephiroth is agile, capable of leaping into the air and executing a powerful downward thrust, creating shockwaves upon landing.

cloud and zack fight sephiroth

Watch out for his swift movements, as he can dart backward before lunging forward with a stabbing motion, or unleash energy waves from a distance. While these attacks can be dodged with quick reflexes, staying on the offensive and maintaining close proximity is key to speeding up the battle.

Be cautious of "Skewer," where Sephiroth momentarily disappears before reemerging to strike upward. Timing your dodge roll is crucial to avoiding this deadly move. Additionally, he can launch purple orbs that lift you into the air, setting you up for an aerial combo.

zacks end

One of his signature moves, "Octaslash," sees Sephiroth unleashing a relentless barrage of slashes that can overwhelm you if not interrupted. "Octaslash Prime" follows, with Sephiroth delivering a flurry of slashes as he dashes past you, reminiscent of his iconic move.

As you chip away at Sephiroth's health, he unleashes a devastating attack, cleaving the arena in two and sending Zack flying away, urging Cloud to continue the fight. Sephiroth then undergoes a transformation, morphing into Sephiroth Reborn, a colossal form resembling his mother's.

Sephiroth Reborn Boss Fight

sephiroth and cloud

Weaknesses: N/A

Immunities: Proportional Damage, Berserk, Deprotect, Deshell, Debrave, Defaith, Slow, Stop, Poison, Silence, Sleep, Petrify, Stone, Morphable Items

Enemy Intel: N/A

Cloud vs. Sephiroth Reborn Sephiroth Reborn presents the ultimate challenge, requiring different tactics for each stage of the battle. "Whisper Vortex" begins with SR slamming its hand down, unleashing swirling vortexes of Whispers across the arena. These tornadoes move erratically before dissipating.

"Errant Whisper" continuously summons Whispers from beneath Cloud, but staying mobile allows you to evade them as they emerge behind you. To expedite this phase, swiftly approach Sephiroth Reborn and target its weak spot—the body.

sephiroth is nearly beaten

With a few well-timed strikes, you can cripple it, causing Sephiroth Reborn to crash through the arena floor. As Cloud ascends the debris, you'll need to manually climb by pushing up on the left analog stick.

Upon reaching the large yellow orb in its chest, circle around to the right, launching off the edge to deliver a series of strikes to its head.

Continuing the battle against the upper half of Sephiroth Reborn, "Interred Horror" sees SR crossing its arms to summon multiple purple AoE explosives on the arena floor.

sephiroth uses interred horror

After the initial detonations, more explosives appear until a third set concludes the attack. Staying mobile and mindful of your positioning will help you evade them effectively.

"Apocalyptic Fire" punishes prolonged proximity as Sephiroth Reborn envelops itself in a burning gas cloud. Although damaging if it hits, you can easily avoid it by promptly dodging backward.

"Hell's Gate" involves Sephiroth Reborn hurling an astral spear into the air, with a tracking circle appearing on the floor before locking in place.

sephiroth unleashes bahamut

Remaining mobile allows you to dodge the spear as it crashes down. At about 75% health, Cloud slashes SR's chest open, releasing dozens of Whispers into the air.

Bahamut Arisen Whisper Phase

bahamut fires gigaflare

Entering the next phase of the battle, Sephiroth Reborn summons a Whisper in the form of the dragon Bahamut to confront the party. Your objective here is to defeat the dragon while preventing Sephiroth Reborn from healing it whenever it attempts to do so.

Bahamut unleashes "Thruster Spin," igniting its wings and spinning multiple times, creating a wide radius of flames that you'll need to avoid.

"Umbral Bombardment" sees Bahamut summoning a red explosive orb in each hand, throwing them in succession, with each detonating upon impact. Time your dodges carefully to avoid the blasts.

"Flame Breath" is a straightforward fire-based attack, while the iconic "Gigaflare" charges up before launching multiple projectiles toward the party, followed by a devastating gigabeam.

bahamut unleashes

"Homing Barrage" involves Bahamut firing a string of homing projectiles from its wings. Rolling as each wave is fired can help you evade them.

In a combo move, "Grim Upheaval" launches you into the air with a red spectral blade, followed by "Celestial Slash," where Bahamut slashes multiple times with its red blades.

"Galewind Slash" is a thrusting attack using its wings as a spear, while "Vulcan Onslaught" barrages the party with smaller projectiles.

Finally, "Soaring Slash" sees Bahamut crashing its body into the ground repeatedly, creating shockwaves that must be avoided.

After Bahamut recovers from the stagger, it retreats close to Sephiroth Reborn, initiating "Blessing of Calamity." Enshrouded within its large yellow wings, Bahamut starts to heal considerably unless you interrupt it. This is where your ATB charges become crucial.

bahamut

Focus your attacks on one of Sephiroth Reborn's wings, pouring all your effort into depleting its health bar and crippling it. Remember that Sephiroth's wings do not regenerate, so if you fail to cripple it initially, you can resume your assault after staggering Bahamut again.

Repeat this process to cripple both of Sephiroth Reborn's wings. Once accomplished, Bahamut Arisen Whisper will be defeated, marking the transition to the next phase of the fight.

Zack vs. Sephiroth Reborn

zack v sephiroth

Zack finds himself in the bed of flowers within the Midgar church, his HP and MP fully restored. Behind him, the menacing sight of the meteor looms dangerously close, while Sephiroth Reborn emerges from it with fierce determination.

In this phase, Zack engages in a one-on-one battle against Sephiroth Reborn. An occasional faint glowing dome appears over the flower patch on the ground. When this happens, rushing inside the dome provides temporary protection from SR's attacks, allowing Zack to heal up or charge his Buster Sword by holding △.

"Unholy Gate" resembles Hell's Gate from the previous phase, but now the crashing spear leaves behind an AoE hazard zone on the floor.

bright light

"Zanshin" sees Sephiroth Reborn slashing at Zack with a spectral purple blade, sending energy waves arcing down toward him, culminating in a final powerful slash with "Zanshin Profaned".

Using "Wail", Sephiroth Reborn can trap Zack in a purple orb, preparing "Retribution" by piercing through the orb and skewering him in the air before hurling him back down to the ground.

If Zack manages to cripple the Chest and stagger Sephiroth during the Pressured stage, he can utilize his Limit Break to swiftly end this phase.

sephiroth's belly

Barret, Yuffie, and Red XIII vs. Sephiroth Reborn

In the next phase, Barret, Yuffie, and Red XIII join the fray against Sephiroth Reborn. This stage presents unique and demanding challenges, primarily relying on magic attacks. Although the Core in SR's chest is the primary target, it remains impervious to damage until the barrier protecting it is destroyed. To achieve this, a specific course of action must be followed.

In this phase, careful attention must be paid to the color of Sephiroth Reborn's wings, each corresponding to an element used in subsequent attacks to affect the arena floor. To counter these attacks effectively, use magic types that "counter" each element by targeting the wings.

The wing colors and their corresponding elements are as follows, alternating with "Altered Affinity":

  • Green wings indicate Wind attacks. Counter with Lightning magic.
  • Blue wings signify Lightning attacks. Counter with Wind magic.
  • Red wings denote Fire attacks. Counter with Ice magic.
  • White wings represent Ice attacks. Counter with Fire magic.

sephiroth wings

Maintain focus on a wing, employing the relevant magic attacks as the colors alternate. Be cautious of the threats and arena effects associated with each element. Utilize the Core as a target to expedite the recovery of ATB charges, replenish MP with consumables as needed, and capitalize on Yuffie's Ninjitsu attack, which enables switching between different elements.

Once both wings are crippled, direct all efforts towards the Core, unleashing every ATB and Limit Break attack to disable it, Pressure Sephiroth Reborn, and initiate the phase's conclusion. Maintain the offensive, but remain vigilant for "Heartless Angel," a move used by Sephiroth Reborn to reduce the HP of multiple party members to 1.

This leaves them vulnerable to defeat upon receiving any additional damage. Act swiftly, using consumables and healing spells to stabilize the party.

sephiroth battle 2

Upon reducing Sephiroth Reborn's health to 0, this phase will end. Returning to Cloud in the astral space, Aerith emerges through a portal, determined to join forces with Cloud to defeat Sephiroth.

Cloud and Aerith vs. Sephiroth

cloud and aerith fight sephiroth

In this climactic phase, Sephiroth unleashes his full power. In addition to his standard sword combos from the initial phase, he employs new devastating attacks. "Grip of Fate" involves launching a Whisper towards you, aiming to Bound and immobilize you.

"Whisper Cannon" is an explosive move where Sephiroth hovers in the air, unleashing a torrent of Whispers while rotating 360 degrees. Although the Whisper stream is avoidable, it's an opportunity to target Sephiroth's wing. Aerith's Sorcerous Storm proves invaluable here, swiftly crippling Sephiroth's wing and applying Pressure.

aerith lets end this

"Whisper Whirlwind" entails Sephiroth plunging Masamune into the ground and conjuring a tornado vortex of Whispers. Targeting Masamune can neutralize the attack by depleting its health bar in time.

As Sephiroth's health diminishes, he initiates "The End is Nigh," unleashing a new devastating attack, "Tempus Finis." Standing in place, he releases a stream of Whispers from both arms while rotating, akin to Whisper Cannon. Dodge the streams while dealing damage, exploiting Sephiroth's vulnerability during the animation.

3,938 EXP, 10 AP, 2,250 Gil, 50 Party EXP

Sephiroth/Sephiroth Reborn

After the confrontation with Sephiroth, he ascends into the sky, chuckling to himself. White Whispers envelop Cloud and Aerith as she takes his hand, leading him back to the lifestream.

Alone amidst the ruins of the church, Zack celebrates briefly before turning his gaze to the looming meteor. As he resigns himself to fate, the ground crumbles beneath him, plunging him into a lifestream tunnel of unknown destination.

zack is gone

In the altar of the Forgotten Capital, the party gathers around Aerith, tears in their eyes. Cloud, however, perceives the scene differently, kneeling alone beside her lifeless body. Cradling her, he calmly implores her to awaken, and to his surprise, she does.

While the rest of the party remains despondent, Cloud experiences a vision of Aerith's materia falling into water before realizing she is sitting beside him. She assures him she'll see them off as they depart in silence.

Meanwhile, in the Shinra Building, Rufus converses with Glenn, revealing that the war with Wutai was merely a distraction to thwart Shinra from halting Sephiroth's plans. Glenn, revealed as a puppet of Sephiroth, announces the commencement of their scheme to forge the "promised land." Enraged, Rufus shoots Glenn repeatedly.

sephiroth and glen are the same

Deep within the lifestream, the Weapons retaliate against the Whispers' onslaught.

In the Midgar church, Zack awakens, pondering if his recent experiences were mere dreams. He acknowledges the possibility of worlds reuniting. In Nibelheim, robed figures and Whispers depart the village toward the reactor.

In a valley, Cloud examines Aerith's clear materia as the party works to repair Cid's airship. Yuffie and Tifa are particularly distressed, while Red XIII murmurs Aerith's name, sensing her presence as a manifestation visible only to Cloud approaches him.

Discovering the black materia, Cloud prepares to join the others, embedding it in his buster sword. As Aerith's voice warns him not to look up, Cloud glimpses a tear in the sky, signaling the planet's impending demise. However, others see nothing when they gaze upward.

men in robes

Cloud asserts that Sephiroth lurks to the north, urging the group to depart. Reluctant, Barret and Tifa eventually agree, emphasizing that the responsibility lies with Cloud to resolve the crisis.

As Cloud agrees impassively, he shares a private moment with Aerith, pledging to stop Sephiroth. Boarding the plane, he leaves Aerith behind as the aircraft vanishes into the horizon.

aerith is left behind

Posted in
Article Contents
    Add a header to begin generating the table of contents